Yyou're craving apple pie but don't have time for a full bake. Enter apple pie bombs; the game-changing dessert that brings all the cozy flavors of classic pie into bite-sized form. These little golden bombs deliver that perfect combination of flaky pastry, sweet spiced apples, and gooey caramel that makes them impossible to resist. Whether you're hosting a fall gathering or just need a quick treat, apple pie bombs are the answer. The best part? Making apple pie bombs is so simple that even beginners can master them in minutes. Get ready to discover why every family needs this recipe in their rotation.
Apple pie bombs have become the ultimate crowd-pleaser for good reason. They're fun, delicious, and require just a handful of ingredients that you probably already have in your kitchen. No complicated techniques; no fancy equipment needed. Just pure, unapologetic comfort food in every bite. If you love everything about apple pie but want something more convenient and portable, these apple pie bombs will change your dessert game forever.
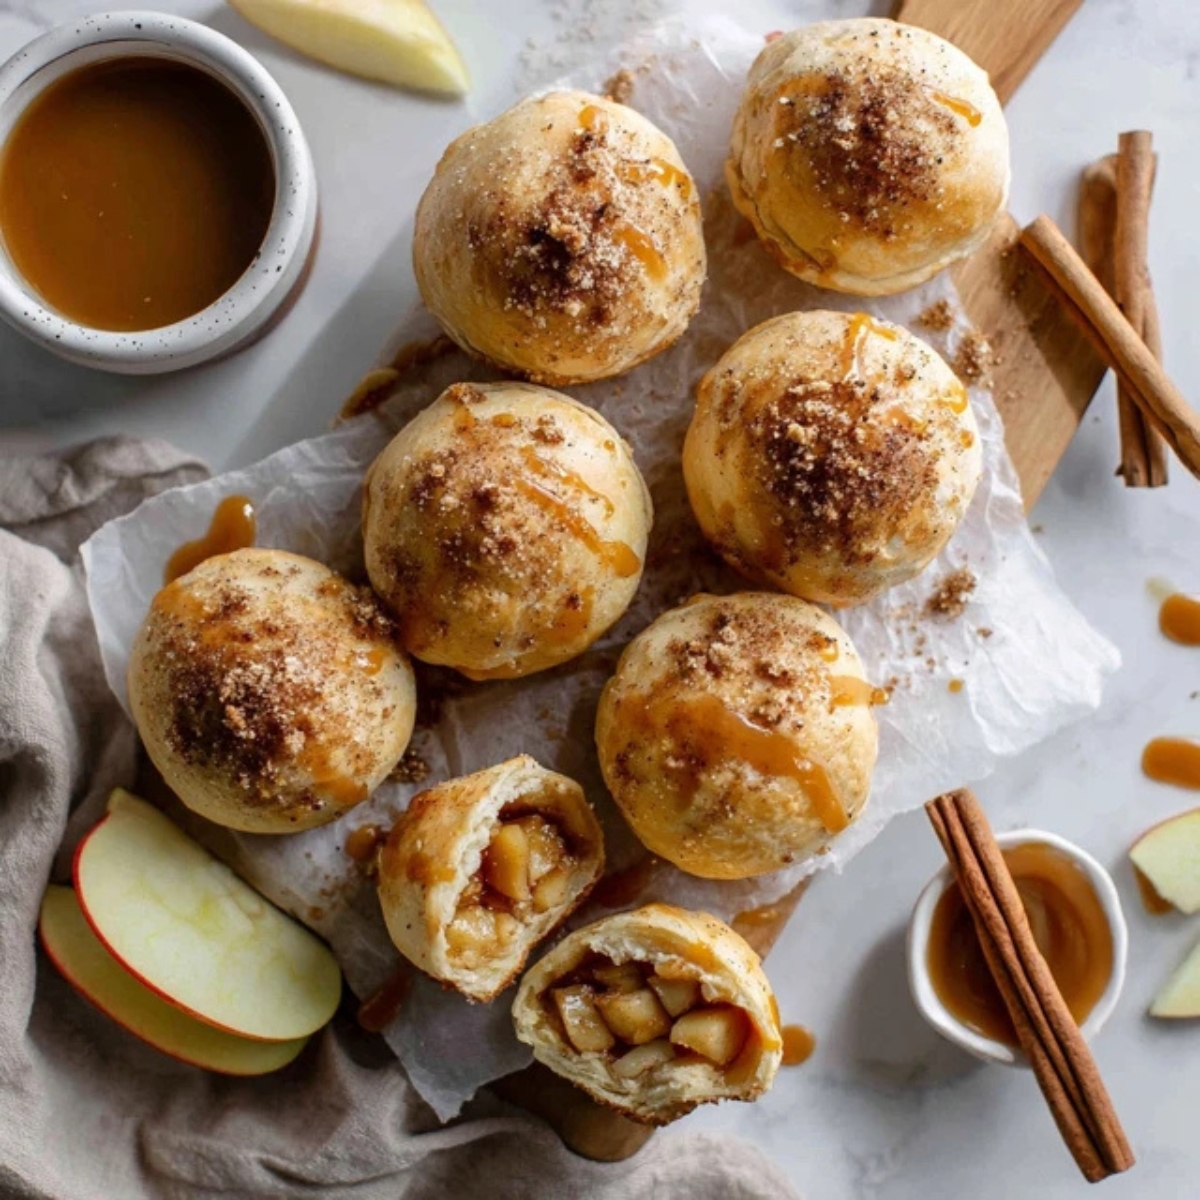
Background & Why This Recipe Stands Out
The beauty of apple pie bombs lies in their perfect blend of tradition and convenience. While classic apple pie requires hours of prep and baking time, apple pie bombs deliver the same nostalgic flavors in a fraction of the time. They're inspired by the classic apple hand pies that grandmothers have made for generations, but with a modern twist that makes them perfect for today's busy families. The flaky pastry exterior creates that satisfying crunch that everyone expects from a quality apple dessert, while the cinnamon-spiced apple filling inside provides that warm, comforting taste we all crave when fall rolls around.
What sets apple pie bombs apart from other desserts is their incredible versatility and accessibility. You can bake them in your oven, fry them for an extra crispy exterior, or even make them in an air fryer for a healthier option. The basic apple pie bombs recipe uses crescent roll dough as the foundation; a shortcut that removes the intimidation factor while still delivering bakery-quality results. Whether you're preparing them for Thanksgiving, a weekend party, or simply because your kids are begging for a fun fruit dessert, apple pie bombs consistently impress. The combination of homemade caramel sauce, vanilla ice cream, and that flaky pastry exterior makes these easy apple bombs feel incredibly special without requiring professional baking skills.
Jump to:
Ingredients
For the Bombs;
- Crescent roll dough (or crescent rolls for a similar texture) ;
- Medium apples; peeled and finely diced (Granny Smith works best)
- Butter
- Brown sugar
- Cinnamon
- Nutmeg
- Allspice
- Salt
- Cornstarch (helps thicken the apple filling) ; Pinch of vanilla extract
For the Caramel Topping;
- Caramel sauce (store-bought or homemade)
- Cinnamon sugar mixture (for dusting before baking)
- Spray cooking oil or water (for sealing edges)
Optional Additions;
- Cream cheese filling
- Maple glaze
- Extra caramel for dipping
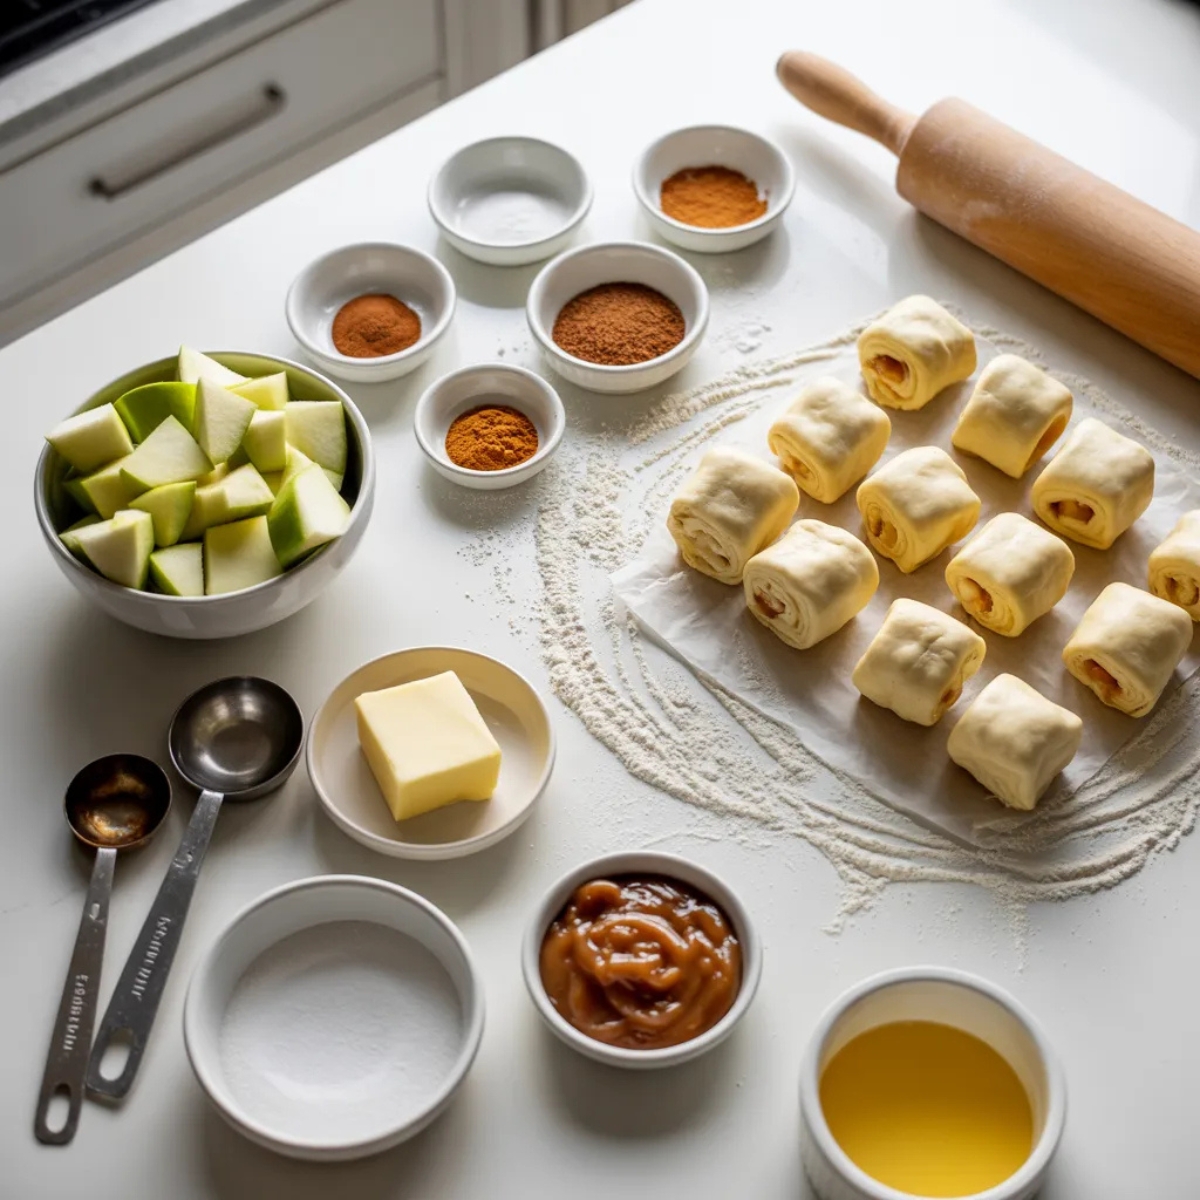
See recipe card for quantities.
Instructions
Step 1; Prepare Your Apple Filling
- Melt butter in a large skillet over medium heat. Add your finely diced apples to the warm butter and stir gently to coat each piece. The key here is cutting your apples small enough that they cook quickly but large enough that they still have texture and won't turn into mush during cooking.
- Sprinkle cinnamon, brown sugar, nutmeg, allspice, and salt over the apples. Stir everything together and let it cook for 3 to 4 minutes until the apples begin to soften slightly but still hold their shape. This creates the perfect apple filling consistency for your apple pie bombs.
- Add the cornstarch and vanilla extract to the mixture; stirring constantly for about 1 minute. The cornstarch thickens the apple filling so it doesn't leak out during baking, which is crucial for successful recipe. Remove from heat and let cool completely; this prevents the dough from getting soggy.
Step 2; Prepare Your Crescent Roll Dough
- Preheat your oven to 375°F (190°C). Unroll your crescent roll dough and gently separate it along the perforations. You should have individual triangle-shaped pieces. For apple pie bombs that are easier to work with, gently flatten each triangle to make it slightly larger.
- If you're using large triangles and want smaller apple pie bombs, cut each triangle in half. This gives you more manageable pieces and creates more bombs from each can. Place your dough pieces on a baking sheet lined with parchment paper.
Step 3; Fill and Seal Your Apple Pie Bombs
- Place about 1 to 1.5 tablespoons of cooled apple filling in the center of each dough piece. If you're adding cream cheese filling, place a small dollop alongside the apple mixture. Remember that less filling is better; overstuffed apple pie bombs tend to burst open during baking.
- Roll up your dough starting at the wide end of the triangle and fold the corners in as you go; creating a ball shape. Press and pinch all seams together firmly to seal. Use water or a light spray of cooking oil on your fingertips to help the dough stick together. The seal is critical for keeping your apple pie bombs intact during cooking.
- Gently roll each sealed bomb between your palms to create a smooth, even surface. Place seam-side down on your prepared baking sheet, leaving about 1 inch between each one for proper air circulation during baking.
Step 4; Bake Your Apple Pie Bombs
- Lightly spray each apple pie bomb with cooking oil or brush with melted butter. Sprinkle generously with cinnamon sugar mixture on all sides. This creates that beautiful, crispy, cinnamon-sugar coating that makes apple pie bombs so irresistible.
- Bake for 12 to 15 minutes until the pastry is golden brown and puffed. The timing depends on your oven; so start checking at the 12-minute mark. Your apple pie bombs are done when the exterior is evenly browned and slightly crispy.
- Remove from the oven and let cool for 2 to 3 minutes before serving. While still warm; drizzle with caramel sauce or serve alongside vanilla ice cream and extra caramel for dipping.
Expert Cooking Tips
Understanding Your Oven Settings
Different cooking methods work beautifully for apple pie bombs; so choose what works best for your kitchen setup.
- Oven Baking; The traditional method at 375°F produces perfectly golden, crispy apple pie bombs with minimal fuss. This works best for large batches and gives you consistent results every time.
- Air Fryer Method; Set your air fryer to 350°F for 10 to 12 minutes. Air fryer apple pie bombs come out incredibly crispy with less oil while still maintaining that flaky pastry texture. This is an excellent choice if you're looking for a slightly lighter version.
- Fried Apple Pie Bombs; Heat oil to 350°F in a deep skillet and fry for 2 to 3 minutes per side until golden. Fried versions are extra decadent and perfect for special occasions or fair food recreations.
Mastering the Apple Filling
The most common issue with apple pie bombs comes down to the filling. If your apples are cut too large, they won't cook properly. If they're too small, they become applesauce. Aim for small dice; about ¼ inch pieces. Always cook your apple filling completely and let it cool before assembling your apple pie bombs; this prevents steam from making the dough soggy.
Sealing Technique Matters
Properly sealed apple pie bombs won't burst open or leak filling during cooking. Use slightly damp fingers to pinch seams together firmly. If a bomb does spring open; just seal it again before baking. Practice makes perfect with apple pie bombs; so don't worry if your first batch isn't flawless.
; Quick Storage During Prep; Assemble your apple pie bombs and refrigerate them for up to 2 hours before baking. This helps the dough firm up and prevents them from opening too much during cooking. Cold dough also creates a flakier pastry exterior.
Recipe Variations & Substitutions
Creative Flavor Combinations
Apple pie bombs don't have to stick to tradition. Try these delicious variations to keep things exciting and cater to different taste preferences.
- Salted Caramel Apple Bombs; Add ¼ teaspoon sea salt to your caramel sauce before drizzling. The salt enhances the sweetness and creates a sophisticated flavor profile. Serve alongside vanilla ice cream for an upscale dessert experience. These salted caramel apple bombs are perfect for impressing guests at dinner parties.
- Maple Glazed Apple Bombs; Substitute the cinnamon sugar topping with a maple glaze made from ¼ cup maple syrup mixed with 2 tablespoons melted butter. This version has a slightly more refined taste and works wonderfully for fall gatherings or Thanksgiving menus.
- Caramel Apple Blossoms; Before sealing; place a small caramel candy in the center of the apple filling. As the apple pie bombs bake; the caramel melts and creates a gooey surprise inside. Your kids will absolutely love discovering this hidden center in their apple bombs.
Dietary Accommodations
- Gluten-Free Apple Pie Bombs; Replace crescent roll dough with gluten-free crescent rolls or puff pastry. The cooking time remains the same; and the results are just as delicious. Most stores carry gluten-free options that work perfectly for this recipe.
- Vegan Apple Pie Bombs; Use vegan crescent roll dough and vegan butter in your apple filling. Serve with coconut ice cream instead of vanilla for a completely plant-based version. These vegan apple pie bombs prove that you don't need animal products to create incredible desserts.
- Cream Cheese Filling Option; Mix 2 ounces softened cream cheese with 1 tablespoon powdered sugar and add a small dollop to each bomb alongside the apple mixture. This creates apple pie bombs with a tangy richness that complements the sweet apples beautifully. The cream cheese filling makes these apple pie bombs feel more indulgent and bakery-quality.
Equipment Recommendations
- Baking Sheets; Use heavy-duty baking sheets for even heat distribution. Avoid thin, flimsy sheets that warp in the oven and cause your apple pie bombs to bake unevenly.
- Parchment Paper; Essential for preventing sticking and making cleanup effortless. Your apple pie bombs slide off easily; and parchment paper conducts heat evenly for consistent browning.
- Cast Iron Skillet; Ideal for cooking your apple filling to perfection. Cast iron distributes heat evenly; preventing hot spots that might cause the apples to burn while others remain undercooked. This is the best choice for developing rich flavor in your filling.
- Air Fryer; If you own one; this is your secret weapon for faster cooking and less oil. Air fryer apple pie bombs are ready in about 10 minutes with minimal cleanup.
- Sharp Knife; Essential for finely dicing your apples quickly and safely. A dull knife requires more pressure and is actually more dangerous. Good tools make apple pie bombs easier to prepare.
Storage & Meal Prep Tips
Refrigeration and Freezing
Proper storage extends the life of your apple pie bombs and makes them ready whenever a dessert craving strikes.
- Room Temperature Storage; Your apple pie bombs keep well at room temperature for up to 2 days in an airtight container. They maintain their texture and flavor remarkably well; making them perfect for packing in lunch boxes or grabbing for quick snacks.
- Refrigerator Storage; Store leftover apple pie bombs in the refrigerator for up to 5 days. When ready to eat; simply reheat in a 325°F oven for 3 to 4 minutes until warmed through. Refrigerated apple pie bombs taste almost as good as freshly baked.
- Freezing for Later; Freeze unbaked apple pie bombs on a baking sheet for 2 hours; then transfer to a freezer bag for up to 3 months. Bake directly from frozen; adding 3 to 4 minutes to the baking time. This makes apple pie bombs incredibly convenient for last-minute dessert emergencies.
Make-Ahead Strategy
Assembly is the most time-consuming part of the recipe. Prepare your apple pie bombs through the sealing stage the night before; refrigerate on a baking sheet covered with plastic wrap; and bake fresh when needed. This advance planning removes the stress from entertaining and ensures your apple pie bombs are warm and delicious right when you need them.
Grandma's Secret That Changed Everything
The one thing that separates good apple pie bombs from extraordinary apple pie bombs is patience with the apple filling. Many people rush this step; but cooling the filling completely before assembly prevents steam damage to your pastry. When your apple filling is still warm; it creates moisture inside the dough; resulting in a soggy bottom instead of that coveted crispy exterior. This simple adjustment makes all the difference between mediocre apple pie bombs and the kind people actually ask you to make again.
Another game-changer is understanding that less filling is more with apple pie bombs. One tablespoon of apple filling per bomb might seem skimpy; but it ensures even cooking and prevents bursting. Overstuffed apple pie bombs look impressive but often fail during baking. Your apple pie bombs succeed when you're disciplined about portion sizes; even though it's tempting to cram them full of that delicious spiced apple mixture.
FAQ
What is the most common mistake people make when making apple pie?
The most frequent error with traditional apple pie is not thickening the filling enough; causing a soupy mess when you slice it. For apple pie bombs; the equivalent mistake is using filling that hasn't cooled completely. Warm filling turns to steam inside the sealed dough; creating soggy pastry instead of crispy exteriors. Always let your apple filling cool to room temperature before assembling your apple pie bombs.
What is the apple pie rule?
Many bakers follow the rule that the ideal apple pie has a 1;3 ratio of crust to filling. For apple pie bombs; this translates to using about 1 tablespoon of apple filling for every bite-sized bomb. This proportion ensures your apple pie bombs stay sealed; cook evenly; and deliver balanced flavor in every bite without overwhelming the delicate pastry.
How long can apple pie sit out unrefrigerated?
Traditional apple pie safely sits at room temperature for about 2 days; as long as it contains no cream-based filling. Your apple pie bombs follow the same rule; staying fresh for up to 2 days on the counter in an airtight container. After that; refrigeration is recommended to prevent spoilage and maintain texture quality.
What are the six ways you can ruin apple pie filling?
The main culprits that damage apple pie filling include; undercooking the apples so they remain too firm; overcooking them until they become mushy; not adding enough thickener which creates a runny filling; adding too much sugar which causes excessive browning; failing to season properly which leaves the filling bland; and using apples that are too large which prevents even cooking. Your apple pie bombs filling avoids these pitfalls by using proper cooking times; appropriate thickener amounts; quality spicing; and appropriately sized apple pieces
Your Journey to Perfect Apple Pie Bombs Starts Now
Making apple pie bombs at home is easier than you think; and the results taste like you spent hours in the kitchen. These little golden treats capture everything we love about classic apple pie while fitting into our busy schedules. From the first crispy bite through that gooey caramel center; apple pie bombs deliver pure dessert satisfaction every single time. Why settle for store-bought treats when homemade apple pie bombs are just 15 minutes away?
Ready to expand your dessert repertoire? Try making our Garlic Parmesan Cheeseburger Bombs Recipe for a savory twist on the same concept; or explore our Apple Pie Bites Recipe for another variation on this beloved format. Your family will be thrilled with the variety; and you'll become known as the person who makes incredible handmade treats. Start with these apple pie bombs today; and prepare for requests that never stop coming.
With love from my kitchen to yours,
Kaitlyn Reed
Related
Looking for other recipes like this? Try these:
Pairing
These are my favorite dishes to serve with this apple pie bombs recipe:

Apple Pie Bombs Recipe
Equipment
- Baking sheet Heavy-duty for even heat
- Parchment paper Prevents sticking
- Cast-iron skillet Ideal for apple filling
- Mixing bowl For combining ingredients
- Sharp knife For dicing apples
- Rolling pin To flatten dough pieces
- Air fryer (optional) For crispier texture
Ingredients
- 2 cans crescent roll dough or crescent rolls for similar texture
- 3 medium apples peeled and finely diced (Granny Smith preferred)
- 3 tablespoon butter unsalted
- 2 tablespoon brown sugar light or dark works
- 1 tablespoon cinnamon for warm spice
- 0.25 teaspoon nutmeg optional
- 0.25 teaspoon allspice optional
- 0.25 teaspoon salt enhances flavor
- 1 tablespoon cornstarch thickens apple filling
- 1 pinch vanilla extract adds warmth
- 0.5 cup caramel sauce for drizzling or dipping
- 2 tablespoon cinnamon sugar for dusting before baking
- cooking spray or water helps seal dough edges
Instructions
- Melt butter and cook diced apples with sugar and spices until softened; stir in cornstarch and vanilla, then cool completely.
- Preheat oven to 375°F (190°C). Separate crescent dough and flatten triangles slightly.
- Add 1 tablespoon apple filling to each piece of dough; roll and seal tightly into balls.
- Brush with butter or oil and sprinkle with cinnamon sugar.
- Bake 12–15 minutes until golden brown and puffed.
- Cool slightly and drizzle with caramel sauce before serving.







Leave a Reply