All the dreamy flavors of traditional cannoli wrapped up in easy-to-serve squares that don't require any fancy pastry skills. That's exactly what you get with this cannoli squares recipe! I stumbled upon this brilliant twist during a potluck disaster when I didn't have time to fill individual cannoli shells. Instead, I transformed the classic into these gorgeous layered bars, and honestly, they disappeared faster than any dessert I'd ever made. These cannoli squares capture that sweet ricotta cream, the satisfying crunch, and those iconic chocolate chips we all love, but in a format that's actually manageable for busy home cooks.
Whether you're planning an Italian-themed dinner party or just craving something special for Sunday dessert, this cannoli squares recipe delivers all the wow factor without the stress. The creamy ricotta filling sits perfectly between buttery layers, studded with mini chocolate chips and finished with a dusting of powdered sugar. Trust me, once you try this method, you'll wonder why anyone bothers with the shells!
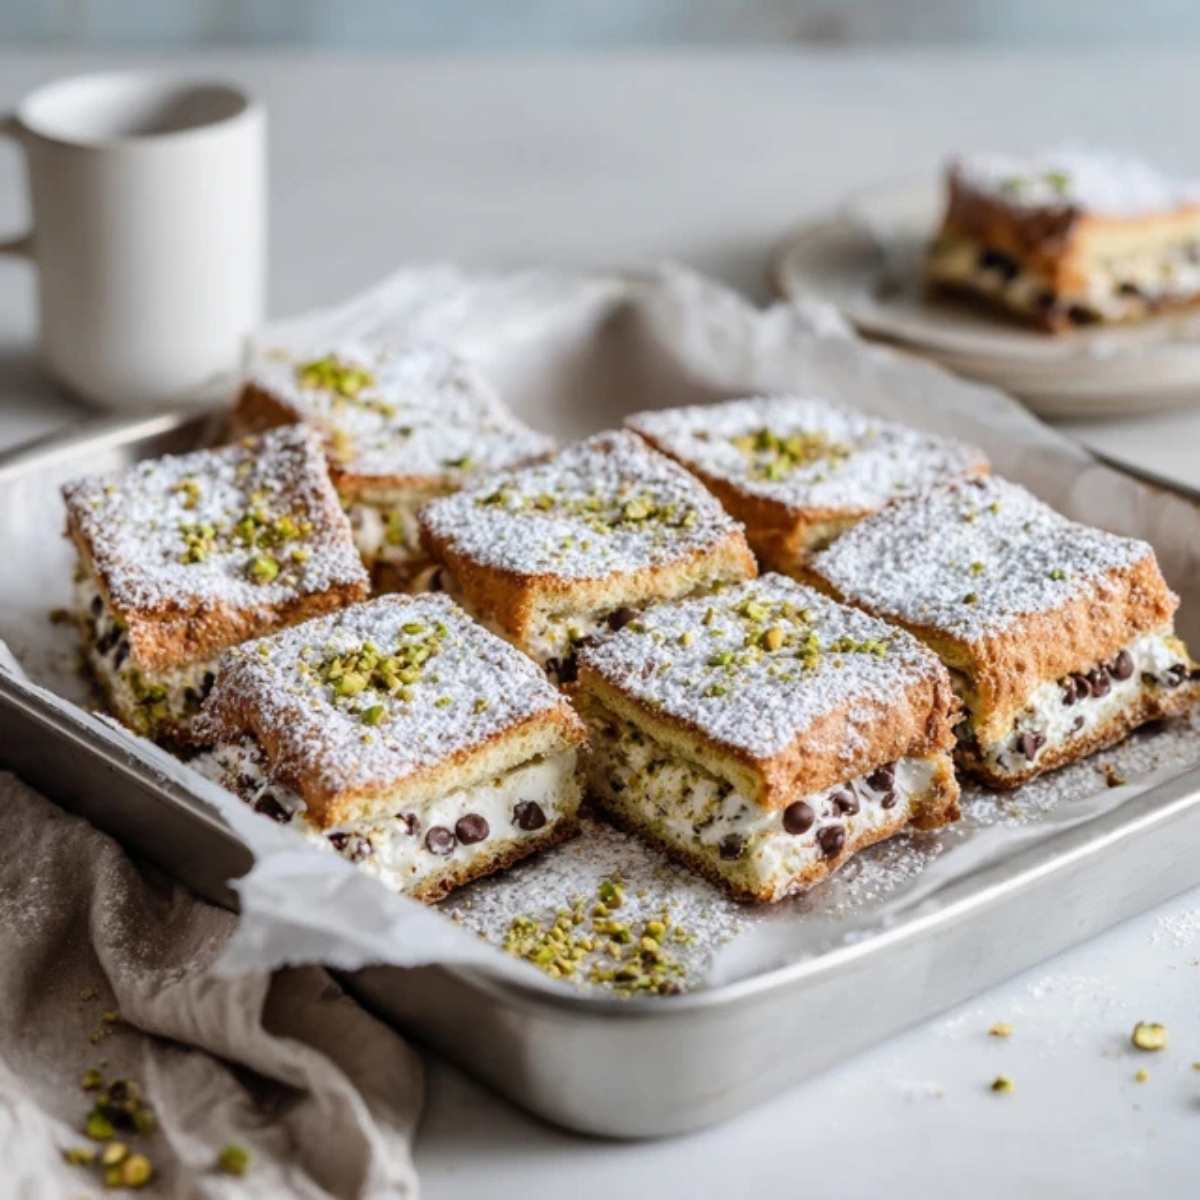
Background & Why This Recipe Changes Everything
Traditional cannoli are absolutely stunning, but let's be real: filling those delicate shells without breaking them takes patience most of us don't have on a Tuesday night. This cannoli squares approach solves that problem beautifully while keeping every single flavor you love intact. The recipe gained popularity in Italian-American communities where home bakers wanted the taste of their grandmother's cannoli without spending hours in the kitchen. These bars have become my go-to for holidays, potlucks, and honestly, any time I need to impress without breaking a sweat.
What makes this cannoli squares recipe truly special is how the flavors actually improve as they chill together. Unlike traditional cannoli where the shell can get soggy if assembled too early, these squares hold up remarkably well. The bottom crust stays pleasantly crisp while the ricotta filling sets into this luscious, almost cheesecake-like texture. I've tested this recipe dozens of times, tweaking the ratios until I found the perfect balance between creamy and structured. The result? A dessert that tastes like you spent all day in the kitchen but actually comes together in about 30 minutes of active work.
Jump to:
- Background & Why This Recipe Changes Everything
- Ingredients
- Instructions
- Expert Cooking Tips
- Recipe Variations & Substitutions
- Equipment Recommendations
- Storage & Meal Prep Tips
- The Game-Changing Secret My Nonna Never Told Me
- FAQ
- Why These Cannoli Squares Deserve a Spot in Your Recipe Box
- Related
- Pairing
- Cannoli Squares Recipe
Ingredients
For the Crust:
- All-purpose flour
- Granulated sugar
- Salt
- Cold unsalted butter, cubed
- Vanilla extract
- Ice water
For the Cannoli Filling:
- Whole milk ricotta cheese, drained
- Powdered sugar
- Mascarpone cheese, room temperature
- Vanilla extract
- Cinnamon
- Mini chocolate chips
- Zest of 1 orange (optional but amazing)
For Topping:
- Chopped pistachios
- Mini chocolate chips
- Powdered sugar for dusting
- Maraschino cherries, chopped (optional)
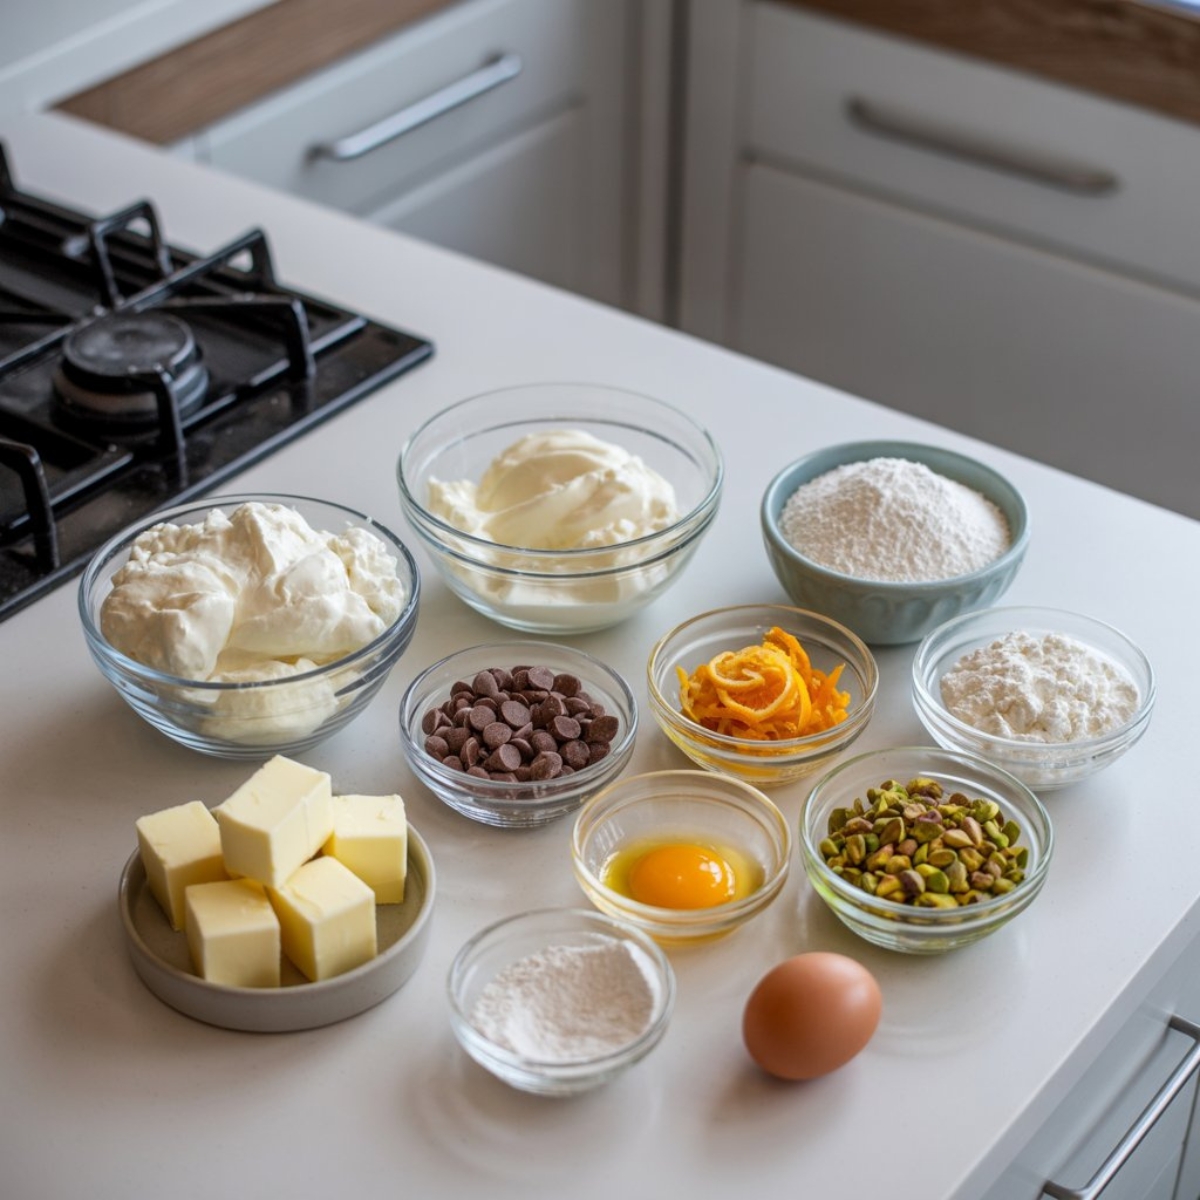
See recipe card for quantities.
Instructions
Step 1: Prepare the Perfect Crust
- Preheat your oven to 350°F and line a 9x13 inch baking pan with parchment paper, leaving overhang on the sides for easy removal.
- In a large bowl, whisk together flour, sugar, and salt until well combined.
- Add the cold butter cubes and use a pastry cutter or your fingers to work the butter into the flour mixture until it resembles coarse crumbs with some pea-sized pieces remaining.
- In a small bowl, whisk together the egg, vanilla extract, and 2 tablespoons of ice water.
- Drizzle the wet ingredients over the flour mixture and stir gently with a fork until the dough just starts to come together; add the remaining tablespoon of water if the mixture seems too dry.
- Press two-thirds of the dough firmly into the bottom of your prepared pan, creating an even layer that goes slightly up the sides.
- Prick the bottom all over with a fork to prevent bubbling, then bake for 18-20 minutes until lightly golden.
Step 2: Create the Creamy Ricotta Filling
- While the crust bakes, place your ricotta cheese in a fine-mesh strainer over a bowl and let it drain for at least 10 minutes to remove excess moisture.
- In a large mixing bowl, beat the drained ricotta with powdered sugar using an electric mixer on medium speed for about 2 minutes until smooth and fluffy.
- Add the mascarpone cheese, vanilla extract, cinnamon, and orange zest if using, then beat for another minute until everything is perfectly combined and creamy.
- Gently fold in the mini chocolate chips using a spatula, making sure they're evenly distributed throughout the filling.
Step 3: Assemble Your Cannoli Squares
- Once the bottom crust has baked and cooled for about 5 minutes, spread the ricotta filling evenly over the warm crust using an offset spatula.
- Crumble the remaining dough over the top of the filling, leaving some gaps so the filling peeks through; this creates that beautiful rustic look.
- Sprinkle the chopped pistachios and additional mini chocolate chips over the crumbled topping.
- Return the pan to the oven and bake for 35-40 minutes until the top is golden brown and the filling is set but still slightly jiggly in the center.
Step 4: Cool and Finish with Style
- Remove the pan from the oven and let it cool completely at room temperature for about an hour; resist the urge to cut into them early or they'll fall apart.
- Once cooled, transfer the entire pan to the refrigerator and chill for at least 3 hours or overnight for the cleanest cuts.
- When ready to serve, use the parchment paper overhang to lift the entire dessert out of the pan onto a cutting board.
- Using a sharp knife wiped clean between cuts, slice into squares of your desired size.
- Dust generously with powdered sugar and top each square with a piece of maraschino cherry if desired before serving.
Expert Cooking Tips
Getting your cannoli squares absolutely perfect comes down to a few key techniques I've learned through lots of trial and error. Here's what makes the biggest difference:
- Drain that ricotta thoroughly. This is hands-down the most important step. If you skip draining the ricotta, your filling will be watery and your squares won't set properly. I actually like to drain my ricotta the night before and keep it in the fridge; you'll be shocked at how much liquid comes out. Some brands are wetter than others, so if you're using a particularly moist ricotta, let it drain for up to 30 minutes. The result? A filling that's dense, creamy, and slices beautifully.
- Keep your butter cold for the crust. Just like making pie dough, cold butter creates those flaky layers we love. I cut my butter into cubes and pop it back in the freezer for 10 minutes before using. When you work it into the flour, you want to see visible butter pieces; those create steam pockets during baking that make the crust tender and crispy.
- Don't overmix the filling. Once you've added the mascarpone and ricotta together, mix just until combined. Overmixing can make the filling dense instead of light and airy. I use my electric mixer on medium speed for no more than 2 minutes total.
- Chill before cutting. I know it's tempting to dive right in, but warm cannoli squares will crumble and fall apart. The chilling time allows the filling to firm up significantly, giving you those perfect, Instagram-worthy slices. Overnight chilling is even better if you can wait!
- Use a hot, clean knife. For the cleanest cuts, run your knife under hot water, dry it completely, and then make your cut. Wipe the knife clean and repeat for each cut. This professional trick works like magic for any creamy dessert.
Recipe Variations & Substitutions
This versatile cannoli squares recipe adapts beautifully to different tastes and dietary needs. Here are my favorite ways to switch things up:
- Make it gluten-free: Replace the all-purpose flour with a 1:1 gluten-free baking flour blend. I've tested this with Bob's Red Mill and King Arthur brands with excellent results. The texture is slightly more tender but still delicious.
- Swap the cheese: Can't find mascarpone? Use full-fat cream cheese instead; just make sure it's softened to room temperature first. The flavor will be slightly tangier but still wonderful. Some Italian bakeries even use half ricotta and half cream cheese in their cannoli filling.
- Add different mix-ins: Beyond chocolate chips, try chopped candied orange peel, crushed amaretti cookies, or even a handful of toasted hazelnuts. My personal favorite variation includes a tablespoon of espresso powder mixed into the filling for a tiramisu-inspired twist.
- Create a no-bake version: Use a graham cracker crust pressed into the pan instead of the homemade pastry crust. You'll need about 2 cups of graham cracker crumbs mixed with 6 tablespoons of melted butter. Press it into the pan, chill for 30 minutes, then add the filling and skip the baking step entirely. These no-bake cannoli squares need to set in the fridge for at least 6 hours.
- Go chocolate crazy: For chocolate lovers, add ¼ cup of cocoa powder to the crust dough and use chocolate chips instead of pistachios on top. You can also drizzle melted dark chocolate over the finished squares for an extra decadent touch.
- Make mini versions: This recipe works beautifully in a muffin tin for individual portions. Press the dough into each cup, add the filling, top with crumbles, and reduce the baking time to about 20-25 minutes.
Equipment Recommendations
Having the right tools makes this cannoli squares recipe even easier to execute. Here's what I reach for every time:
- 9x13 inch metal baking pan: Metal conducts heat better than glass, giving you a crispier bottom crust that won't get soggy.
- Parchment paper: Essential for lifting the whole dessert out cleanly. Don't skip this step!
- Fine-mesh strainer: Critical for draining the ricotta properly; a colander with large holes won't work as well.
- Electric mixer: While you can mix by hand, an electric mixer makes the filling incredibly smooth and fluffy in half the time.
- Pastry cutter or food processor: Either tool works great for cutting butter into flour; I prefer my pastry cutter for better control.
- Offset spatula: Makes spreading the filling evenly so much easier than a regular spoon or knife.
- Sharp chef's knife: For clean cuts through the chilled squares without dragging the filling.
Storage & Meal Prep Tips
These cannoli squares actually taste better after they've had time to chill and set, making them perfect for advance preparation. Here's how to handle storage like a pro:
- Refrigerator storage: Keep your cannoli squares in an airtight container in the refrigerator for up to 5 days. I like to place parchment paper between layers if I'm stacking them to prevent sticking. The filling stays fresh and the crust maintains its texture beautifully during this time.
- Freezing instructions: Yes, you can freeze these! Wrap individual squares tightly in plastic wrap, then place them in a freezer-safe container or bag. They'll keep for up to 2 months frozen. Thaw overnight in the refrigerator before serving; don't thaw at room temperature or condensation will make them soggy.
- Make-ahead strategy: You can prepare the crust a day ahead and keep it wrapped tightly in the pan in the refrigerator. You can also make the filling up to 24 hours in advance and store it separately in the fridge. Just bring the filling to room temperature before assembling, or it'll be too stiff to spread.
- Serving temperature: These cannoli squares taste best when served cold straight from the refrigerator. The filling is at its creamiest and most flavorful when chilled, and the contrast with the room-temperature crust is absolutely perfect.
- Travel tips: If you're bringing these to a party, transport them in the pan covered with plastic wrap, then cut and dust with powdered sugar right before serving. The powdered sugar can absorb moisture if added too early, so save that step for last.
The Game-Changing Secret My Nonna Never Told Me
Here's something that transformed my cannoli squares from good to absolutely incredible: add a thin layer of melted chocolate between the crust and filling. I discovered this trick completely by accident when I had leftover melted chocolate from another project. Brush about ½ cup of melted semi-sweet chocolate over your pre-baked crust and let it set for 10 minutes before adding the ricotta filling. This creates a moisture barrier that keeps the bottom crust crispy even after days in the fridge, plus it adds another dimension of chocolate flavor that makes these cannoli squares taste like they came from a professional bakery.
The second secret? A splash of amaretto liqueur in the filling. Just one tablespoon mixed into the ricotta adds a sophisticated almond flavor that elevates the entire dessert without making it taste boozy. This is completely optional, especially if you're serving kids, but it's the difference between homemade and restaurant-quality. My Italian grandmother used to add a hint of liqueur to all her ricotta desserts, and now I understand why; it brightens all the other flavors and adds complexity you can't quite put your finger on.
FAQ
Are cannolis supposed to be crunchy or soft?
Traditional cannoli shells should be crunchy and crispy, providing textural contrast to the creamy ricotta filling inside. However, these cannoli squares feature a tender, slightly flaky crust on the bottom with a crumbly topping that offers a different but equally delicious texture. The filling remains soft and creamy, giving you the best of both worlds in every bite.
What is an interesting fact about cannoli?
Cannoli originated in Sicily during the Arab rule and were traditionally made during Carnevale celebrations as a symbol of fertility. The name "cannoli" comes from "canna," meaning reed or tube, referring to the cylindrical molds originally made from river reeds that gave cannoli squares their iconic shell shape. These modern cannoli squares take that centuries-old tradition and make it accessible for home bakers everywhere.
How long is cannoli filling good for?
Cannoli filling made with ricotta and mascarpone stays fresh in the refrigerator for 3-4 days when stored in an airtight container. For these cannoli squares, the assembled dessert will keep well for up to 5 days because the filling is protected by the crust layers, which helps preserve freshness and prevent the ricotta from absorbing other flavors from your fridge.
Should cannoli be served cold?
Yes, cannoli and cannoli squares should always be served cold! The chilled temperature keeps the ricotta filling firm and creamy while enhancing all the flavors. Traditional cannoli shells are often filled right before serving to maintain crispness, but these cannoli squares actually benefit from chilling time as it allows the filling to set properly and makes them easier to cut into perfect portions.
Why These Cannoli Squares Deserve a Spot in Your Recipe Box
After making countless batches of these cannoli squares for family gatherings, holidays, and random Tuesday nights when I needed something special, I can confidently say this recipe has earned its place among my most treasured desserts. The beauty of this cannoli squares approach is how it takes an intimidating Italian classic and transforms it into something achievable for any home baker, regardless of skill level. You get all the rich, creamy, chocolate-studded goodness of traditional cannoli without the stress of working with fragile shells or last-minute assembly.
Whether you're feeding a crowd or just treating yourself to something sweet, these cannoli squares deliver impressive results every single time. The combination of that buttery crust, luxurious ricotta filling, and satisfying crunch from pistachios and chocolate creates layers of flavor and texture that'll have everyone asking for the recipe. Make a batch this weekend and watch them disappear; then try my Cannoli Cookies Recipe for another twist on this beloved Italian treat, or if you're in the mood for something different, check out my Banana Bread Brownies Recipe that's equally irresistible. Trust me, your dessert game will never be the same once you master these incredible cannoli squares!
With love from my kitchen to yours,
Kaitlyn Reed
Related
Looking for other recipes like this? Try these:
Pairing
These are my favorite dishes to serve with [this cannoli squares recipe:

Cannoli Squares Recipe
Equipment
- 9x13 inch baking pan
- Parchment paper
- Fine-mesh strainer
- Electric mixer
- Pastry cutter or food processor
- Offset spatula
- Sharp Chef’s Knife
Ingredients
For the Crust
- 2 cups all-purpose flour
- ¼ cup granulated sugar
- ½ teaspoon salt
- ¾ cup cold unsalted butter cubed
- 1 large egg
- 1 teaspoon vanilla extract
- 2–3 tablespoon ice water
For the Cannoli Filling
- 32 oz ricotta cheese drained well
- 1 cup powdered sugar
- 8 oz mascarpone cheese room temperature
- 1 teaspoon vanilla extract
- ½ teaspoon cinnamon
- 1 cup mini chocolate chips
- Zest of 1 orange optional
For the Topping
- ¼ cup chopped pistachios
- ¼ cup mini chocolate chips
- Powdered sugar for dusting
- Chopped maraschino cherries optional
Instructions
- Heat oven to 350°F and line a 9x13 pan with parchment.
- Combine flour, sugar, and salt; cut in cold butter using pastry cutter or processor.
- Stir in egg, vanilla, and ice water until dough forms.
- Press ⅔ of dough into pan, prick with fork, and bake 18–20 minutes.
- Drain ricotta in fine strainer for at least 10 minutes.
- Beat ricotta, powdered sugar, mascarpone, vanilla, cinnamon, and orange zest until smooth.
- Fold in mini chocolate chips gently.
- Spread ricotta mixture evenly over warm crust with offset spatula.
- Crumble remaining dough over the filling.
- Sprinkle pistachios and extra chocolate chips on top.
- Bake 35–40 minutes until golden brown.
- Cool in pan 1 hour at room temperature.
- Refrigerate at least 3 hours or overnight.
- Lift using parchment, slice into squares, dust with powdered sugar, and garnish with cherries if desired.









Leave a Reply