
Making gluten free tart shells at home doesn't have to be complicated or intimidating. Whether you're preparing mini gluten free desserts for a party or creating stunning gluten free tartlets for a special occasion, this recipe delivers perfectly crispy, buttery shells every single time. These gluten free tart shells are so delicious that even those without dietary restrictions won't notice the difference; they're flaky, tender, and hold their shape beautifully with any filling you choose. The best part? You only need a handful of simple ingredients and about 30 minutes to create bakery-quality gluten free tart shells right in your own kitchen.

Background & Why This Homemade Approach Wins
Store-bought gluten free tart shells often disappoint with their cardboard-like texture and artificial taste, which is exactly why learning to make gluten free tart shells from scratch changes everything. This recipe uses a carefully balanced blend of almond flour and rice flour to create a gluten free tart crust that's both sturdy enough to hold fillings and delicate enough to melt in your mouth. The secret lies in the proper ratio of fats to flours and the gentle handling technique that prevents the dough from becoming tough or crumbly. When you master homemade gluten free tart shells, you unlock endless possibilities; from sweet strawberry tartlets to savory mini quiche creations, these versatile shells become your blank canvas for culinary creativity.
Jump to:
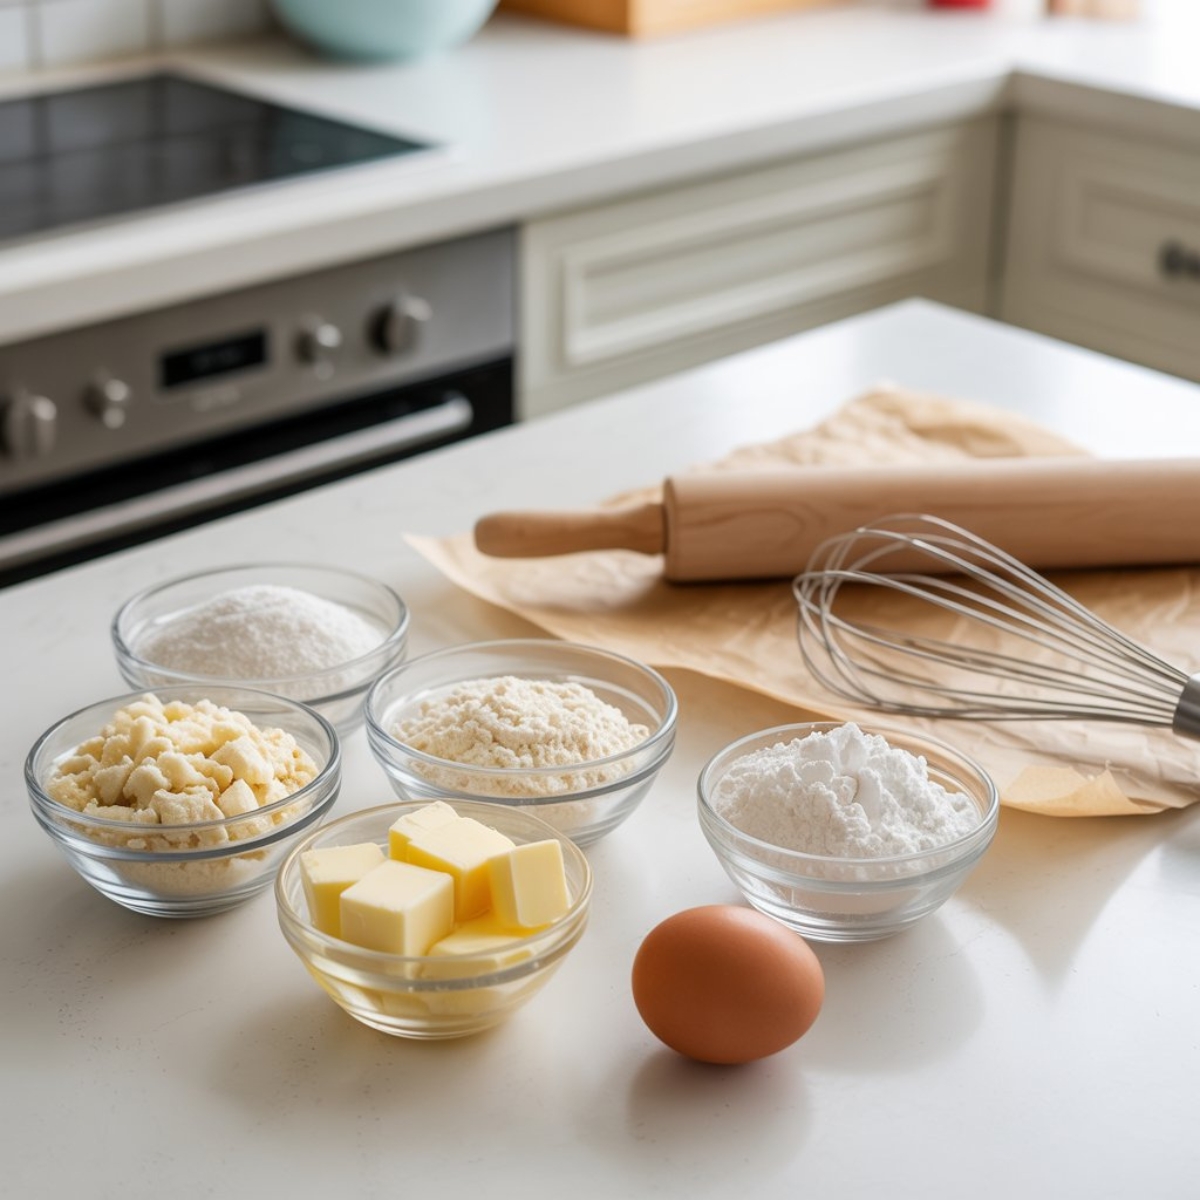
Ingredients
For the Gluten Free Tart Dough:
- Almond flour (finely ground, blanched)
- Rice flour (white or brown)
- Tapioca starch
- Powdered sugar (for sweet shells; omit for savory)
- Xanthan gum
- Salt
- Cold butter (or dairy-free butter for vegan option), cubed
- Egg (cold)
- Ice water (as needed)
Optional Flavor Boosters:
- Vanilla extract (for sweet tarts)
- Zest of 1 lemon (for fruit tarts)
- Herbs (for savory applications)
Ingredient Notes: The combination of almond flour and rice flour creates the perfect texture; almond flour adds richness and moisture while rice flour provides structure. Tapioca starch helps bind everything together and creates that desirable flaky texture. If you're nut-free, substitute the almond flour with additional rice flour plus 2 tablespoons of coconut flour.
See recipe card for quantities.
Instructions
Step 1; Preparing Your Gluten Free Tart Dough
- Combine all dry ingredients (almond flour, rice flour, tapioca starch, powdered sugar, xanthan gum, and salt) in a large mixing bowl and whisk thoroughly to eliminate any lumps.
- Add the cold cubed butter to the flour mixture and use a pastry cutter or your fingertips to work it in until the mixture resembles coarse breadcrumbs with some pea-sized butter pieces remaining.
- Make a well in the center and add the cold egg, mixing gently with a fork until the dough starts to come together.
- Add ice water one tablespoon at a time, mixing just until the dough forms a cohesive ball; be careful not to overwork it.
- Shape the dough into a flat disk, wrap tightly in plastic wrap, and refrigerate for at least 30 minutes (or up to 2 days).
Step 2; Rolling and Shaping Your Shells
- Remove dough from refrigerator and let sit for 5 minutes to soften slightly for easier rolling.
- Place dough between two sheets of parchment paper and roll to about ⅛-inch thickness, rotating frequently to maintain even thickness.
- Use a round cutter (3-4 inches for standard tart pans, 2 inches for mini tart shells) to cut circles from the dough.
- Carefully press each circle into your greased tart pan or muffin tin, ensuring the dough fits snugly into corners and comes up the sides evenly.
- Trim any excess dough from the edges using a sharp knife or by rolling a rolling pin across the top of the pan.
- Prick the bottom of each shell multiple times with a fork to prevent puffing during baking.
Step 3; Blind Baking for Perfect Results
- Preheat your oven to 350°F (175°C) and position the rack in the center.
- Line each tart shell with a small piece of parchment paper and fill with pie weights, dried beans, or rice to prevent shrinking.
- Place the filled tart pans on a baking sheet for easy handling and bake for 12 minutes.
- Carefully remove the parchment paper and weights, then return shells to the oven and bake for an additional 8-10 minutes until the edges are lightly golden and the centers look dry.
- Remove from oven and allow to cool completely in the pans before attempting to remove or fill; gluten free tart shells are delicate when warm but firm up beautifully as they cool.
Step 4; Final Touches and Cooling
- Once the shells are cool enough to handle (about 10 minutes), gently remove them from the pans by running a thin knife around the edges if needed.
- Transfer to a wire cooling rack and allow to cool completely before filling.
- If you notice any small cracks, you can patch them with a tiny bit of leftover dough and return to the oven for 2-3 minutes.
- For an extra-shiny finish, brush the cooled shells with a light coating of melted butter or coconut oil before filling.
Expert Cooking Tips
Creating perfect gluten free tart shells requires attention to a few key details that make all the difference between amateur and professional results.
- Temperature Control Matters Keep your ingredients cold throughout the process; cold butter creates those desirable flaky layers, and warm dough becomes sticky and difficult to handle. If your kitchen is warm, pop the dough back in the refrigerator for 10 minutes whenever it starts feeling too soft. This simple pause prevents frustration and ensures better results.
- Don't Skip the Parchment Paper Rolling gluten free tart dough between parchment paper sheets eliminates the need for extra flour (which can make the shells tough) and prevents sticking. This technique also makes transferring the dough to your pans much easier and reduces tearing.
- The Fork Prick Technique Docking (pricking with a fork) is crucial for gluten free pastry shells because they tend to puff more than traditional crusts. Create a pattern of holes about ½ inch apart across the entire bottom surface.
- Blind Baking Is Non-Negotiable Unlike some traditional recipes, gluten free tart shells must be blind-baked to achieve the proper texture. Skipping this step results in soggy bottoms and structural failure when you add wet fillings.
- Master the Touch Test Your dough should feel like Play-Doh; not too dry and crumbly, not too wet and sticky. If it's crumbling apart, add water one teaspoon at a time. If it's sticking to everything, work in a tablespoon of rice flour.
Recipe Variations & Substitutions
This versatile gluten free tart shells recipe adapts beautifully to various dietary needs and flavor preferences.
Dairy-Free and Vegan Adaptations Replace butter with equal amounts of vegan butter or coconut oil (chilled solid), and substitute the egg with a flax egg (1 tablespoon ground flaxseed mixed with 3 tablespoons water, left to gel for 5 minutes). The texture will be slightly different but still delicious for vegan gluten free tart shells.
Nut-Free Modifications For those with nut allergies, replace almond flour with an equal amount of oat flour (certified gluten-free) or sunflower seed flour. You may need to add an extra tablespoon of tapioca starch for proper binding.
Sweet vs. Savory Versions
- Sweet shells: Add the powdered sugar, vanilla extract, or citrus zest as listed in the recipe
- Savory shells: Omit sugar entirely and consider adding dried herbs like thyme, rosemary, or Italian seasoning, plus a pinch of garlic powder
Flour Blend Alternatives If you don't have both almond and rice flour, you can use a commercial gluten free flour blend (like Bob's Red Mill 1-to-1), but reduce xanthan gum to ⅛ teaspoon since most blends already contain it.
Size Variations This recipe makes approximately 12 standard 4-inch tart shells, 24 mini 2-inch tartlets, or one 9-inch tart shell. Adjust baking time accordingly; mini shells need only 15-18 minutes total, while a large tart shell needs 25-30 minutes.
Equipment Recommendations
Having the right tools makes preparing gluten free tart shells significantly easier and more successful.
- Tart Pans with Removable Bottoms: These make unmolding so much easier; look for 4-inch pans for individual servings or a standard 9-inch for larger tarts
- Mini Muffin Tins: Perfect alternative for creating bite-sized gluten free mini tart shells without specialized equipment
- Pastry Cutter or Food Processor: Either works beautifully for cutting butter into flour; a food processor is faster but requires careful attention to avoid overprocessing
- Rolling Pin: A French-style rolling pin without handles gives you better control when working with delicate gluten free tart dough
- Parchment Paper: Essential for rolling out dough without adding extra flour
- Pie Weights or Dried Beans: Crucial for proper blind baking; ceramic or metal pie weights work best but dried beans are a budget-friendly option
- Round Cookie Cutters: Get a set with various sizes to accommodate different pan sizes
- Wire Cooling Rack: Allows air circulation for even cooling and prevents soggy bottoms
Storage & Meal Prep Tips
Proper storage extends the life of your gluten free tart shells and makes meal prep a breeze.
Room Temperature Storage Unfilled gluten free tart shells stay fresh in an airtight container at room temperature for up to 3 days. Place parchment paper between layers to prevent sticking and keep them away from humidity.
Refrigerator Storage Filled shells should be refrigerated and will keep for 2-3 days depending on the filling. Custard and cream-based fillings have shorter shelf lives than fruit or chocolate fillings.
Freezer Storage for Maximum Convenience Both unbaked dough and baked shells freeze exceptionally well:
- Unbaked dough: Wrap tightly in plastic wrap, then place in a freezer bag for up to 3 months; thaw overnight in refrigerator before using
- Baked shells: Freeze in airtight containers with parchment between layers for up to 2 months; no thawing needed before filling, though bringing to room temperature improves texture
Make-Ahead Strategy Prepare and blind-bake your gluten free tart shells up to 2 days in advance; store at room temperature until ready to fill. This approach spreads out the work and actually improves texture as the shells crisp up further.
The Golden Rule That Changes Everything
Here's the secret that separates perfect gluten free tart shells from disappointing ones; let your dough rest. After mixing, that 30-minute chill time isn't optional or just a suggestion from fussy bakers. During this rest period, the gluten free flours fully hydrate, the xanthan gum activates its binding properties, and the butter firms back up to create those beautiful flaky layers we're after.
Professional bakers often chill their dough overnight because longer rest times produce even better results. The second crucial secret? Always bake your gluten free tart shells on the center oven rack with a preheated oven. Temperature fluctuations cause cracking and uneven baking, so resist the urge to peek too often; trust the process and you'll be rewarded with bakery-quality shells every single time.
FAQ
How long to bake gluten-free tart shells?
Gluten free tart shells typically need 20-22 minutes total baking time at 350°F; 12 minutes with pie weights, then 8-10 minutes without. Mini gluten free tart shells require less time (15-18 minutes total), while a full 9-inch tart needs 25-30 minutes. The shells are done when edges are lightly golden and the center looks dry and set.
What are common gluten free pastry mistakes?
The most frequent mistakes with gluten free tart shells include adding too much liquid (making dough sticky), not chilling the dough long enough (resulting in shrinkage), skipping blind baking (causing soggy bottoms), and overworking the dough (creating tough shells). Temperature control and gentle handling are key to success.
What are common problems with gluten-free crust?
Common issues with gluten free tart shells include cracking (usually from dough that's too dry or overbaked), excessive crumbling (insufficient binding or fat), shrinking during baking (dough not properly chilled), and sogginess (inadequate blind baking or filling added while shells were still warm). Most problems are easily prevented with proper technique.
Do you have to bake longer when using gluten-free flour?
Gluten free tart shells actually bake at similar times to traditional crusts, sometimes even slightly faster. The key difference isn't baking time but temperature consistency; gluten free pastries are more sensitive to temperature fluctuations. Always preheat your oven fully and avoid opening the door during the first 10 minutes of baking to prevent cracking or uneven cooking.
Your Next Gluten-Free Baking Adventure Awaits
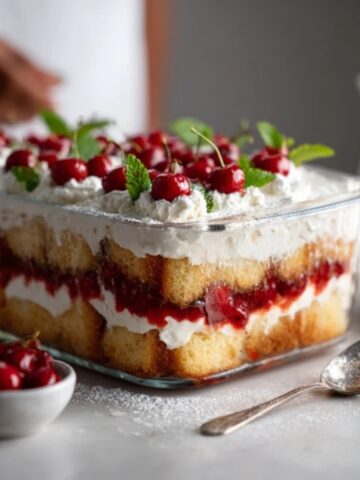
Now that you've mastered these beautiful gluten free tart shells, you're ready to create an endless variety of stunning desserts and savory dishes. These crispy, buttery shells are perfect vessels for everything from classic lemon curd to fresh berry compotes, chocolate ganache, or even savory quiche fillings. The versatility of gluten free tart shells means you'll reach for this recipe again and again throughout the year, whether you're preparing elegant gluten free mini desserts for entertaining or creating simple weeknight treats for your family. Once you experience the satisfaction of pulling perfect homemade gluten free tart shells from your oven, you'll never go back to store-bought versions.
Continue your gluten free baking journey with our Gluten Free French Toast Recipe for a delightful breakfast option, or try our Gluten Free Pumpkin Coffee Cake Recipe when you're craving something sweet and seasonal. Both recipes share the same attention to texture and flavor that makes these gluten free tart shells so successful, and they're perfect for anyone embracing gluten-free living without sacrificing taste or quality.
With love from my kitchen to yours,
Taylor Monroe
Related
Looking for other recipes like this? Try these:


Pairing
These are my favorite dishes to serve with this gluten free tart shell recipe:


Gluten-Free Tart Shells Recipe
Equipment
- Mixing bowl For combining dry and wet ingredients
- Pastry cutter or food processor For cutting butter into flour
- Rolling pin Preferably French-style
- Sheets of parchment paper Prevents sticking when rolling dough
- Tart pans or muffin tin For shaping shells
- Baking sheet Makes handling easier
- Set of pie weights or dried beans For blind baking
- Wire cooling rack For cooling baked shells
Ingredients
- 1.5 cups almond flour finely ground, blanched
- 0.75 cup rice flour white or brown
- 0.25 cup tapioca starch helps bind dough
- 0.25 cup powdered sugar omit for savory shells
- 0.5 teaspoon xanthan gum improves texture
- 0.25 teaspoon salt enhances flavor
- 0.5 cup cold butter or dairy-free butter alternative
- 1 large egg cold
- 1-2 tablespoon ice water add as needed
- 1 teaspoon vanilla extract optional, for sweet shells
- 1 lemon zest optional, for fruit tarts
- 0.5 teaspoon dried herbs optional, for savory shells
Instructions
- Whisk dry ingredients together in a mixing bowl.
- Cut in cold butter until mixture resembles coarse crumbs.
- Add egg and water, mixing until dough forms.
- Chill dough for 30 minutes before rolling.
- Roll between parchment to ⅛-inch thickness.
- Cut circles and press into tart pans.
- Prick bottoms with a fork to prevent puffing.
- Line with parchment, fill with weights, and bake 12 minutes at 350°F.
- Remove weights and bake 8–10 more minutes until golden.
- Cool completely before filling.


Leave a Reply