
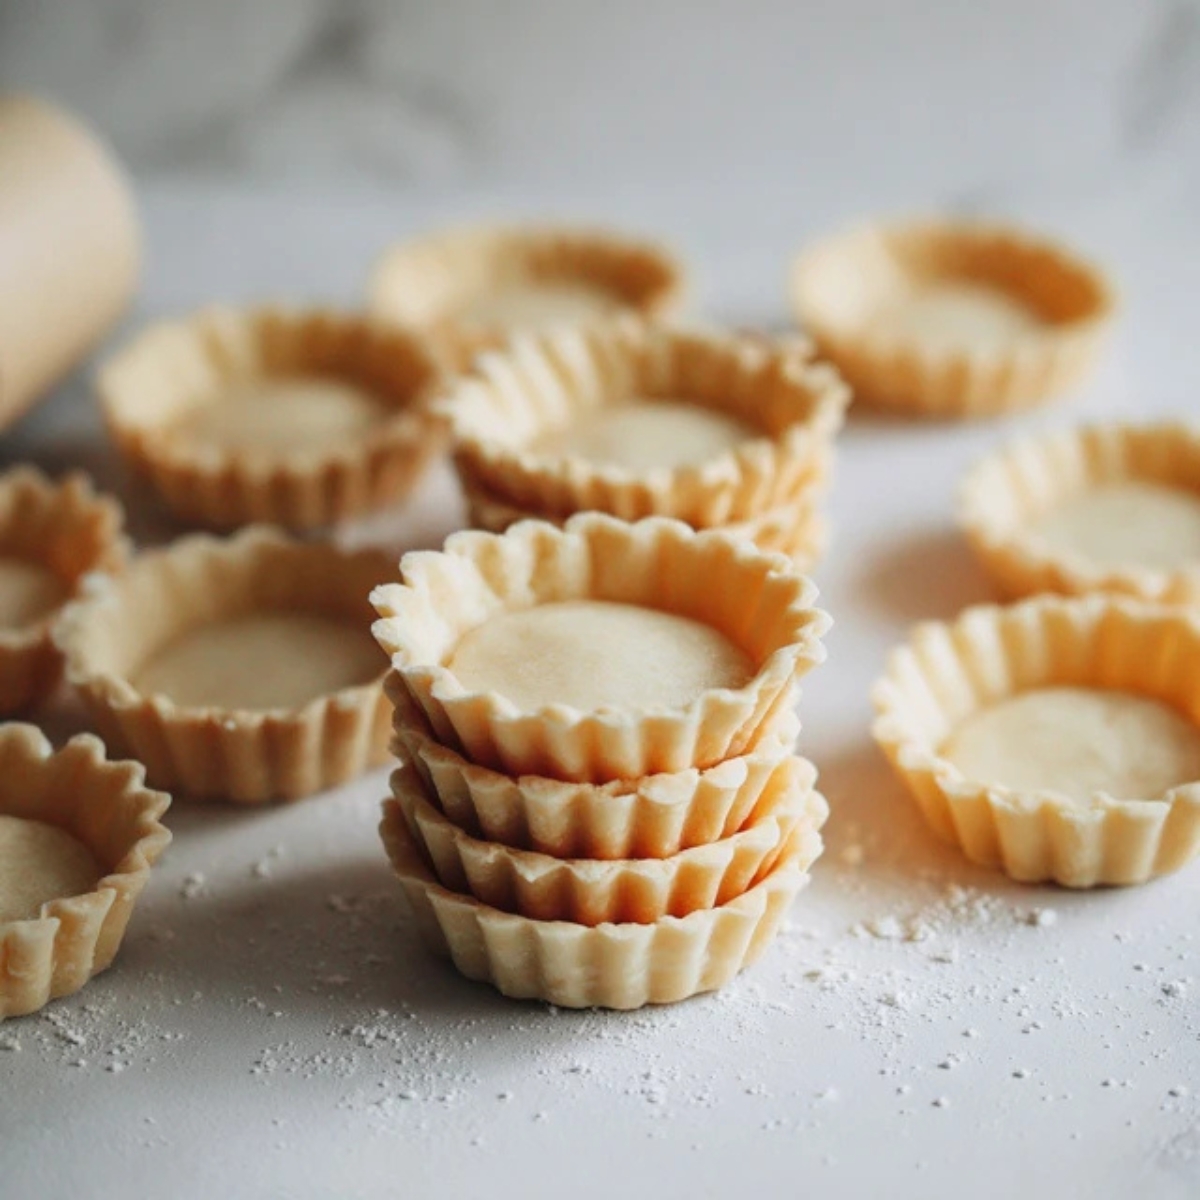
There's something magical about mini tart shells that makes every dessert feel special. Whether you're hosting an afternoon tea, planning a party, or just want to impress your family, knowing how to make mini tart shells from scratch is a game-changer. These buttery, crispy little cups are incredibly versatile and easier to make than you might think. I still remember the first time I made mini tart shells; the kitchen smelled amazing, and my guests couldn't stop raving about them.
The best part? These mini tart shells work for absolutely everything. Fill them with lemon curd for a tangy treat, chocolate ganache for something rich, or even savory fillings like cheese and herbs for appetizers. Once you master this basic mini tart shells recipe, you'll find yourself making them all the time. They're perfect for beginners and experienced bakers alike, requiring just a few simple ingredients and about 30 minutes of your time.
Background & Why This Recipe Stands Out
Mini tart shells have been a staple in French patisseries for centuries, and for good reason. They're the perfect individual portion that looks elegant but doesn't require fancy skills. What makes this mini tart shells recipe special is its foolproof method; the dough comes together quickly, handles beautifully, and bakes up golden and crisp every single time. Unlike some pastry recipes that leave you guessing, this one gives you consistent results that taste like they came from a bakery.
These homemade mini tart shells beat store-bought versions hands down. They're fresher, taste better, and you control exactly what goes into them. Plus, making your own mini tart shells means you can customize the size and shape to fit your needs. Whether you're making mini fruit tart shells for a summer party or savory mini tart shells for a dinner party, this recipe adapts perfectly. The buttery shortcrust pastry strikes the perfect balance between tender and sturdy, so your fillings won't make them soggy.
Jump to:
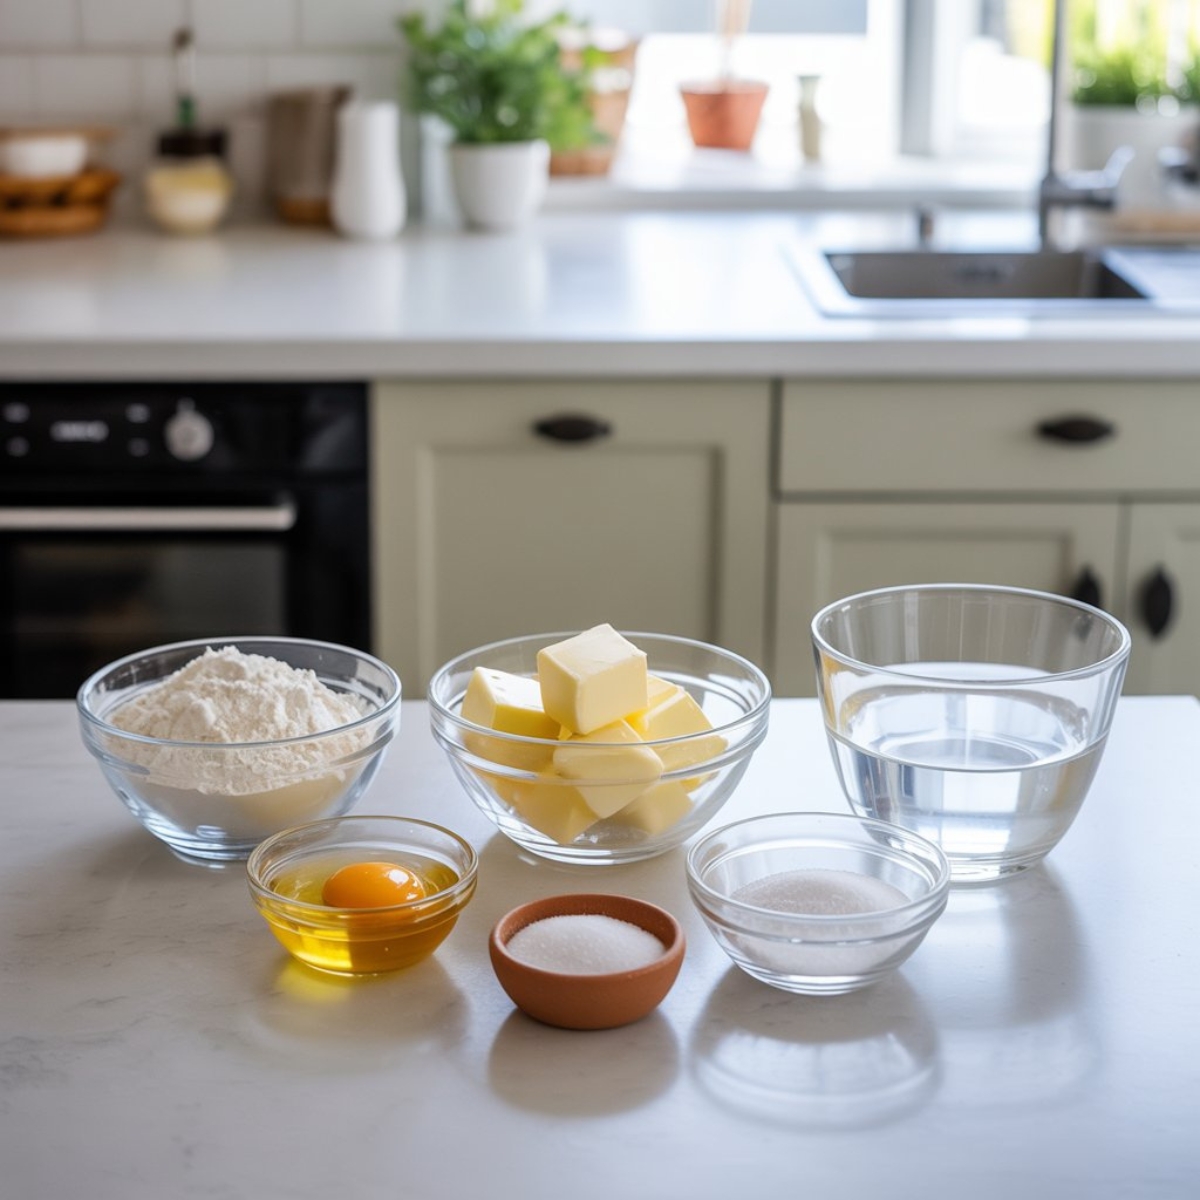
Ingredients
For the Tart Shells
- All-purpose flour
- Cold unsalted butter, cubed
- Granulated sugar (omit for savory versions)
- Egg yolk
- Ice water
- Salt
- Vanilla extract (optional, for sweet shells)
Optional Add-ins
- Cocoa powder (for chocolate mini tart shells)
- Zest of 1 lemon (for citrus mini tart shells)
- Finely ground almonds (for extra flavor)
See recipe card for quantities.
Instructions
Step 1: Prepare the Dough
- Combine the flour, sugar (if using), and salt in a large mixing bowl.
- Add the cold butter cubes and use a pastry cutter or your fingertips to work the butter into the flour until it resembles coarse crumbs.
- Mix in the egg yolk and vanilla extract if using.
- Add ice water one tablespoon at a time, mixing gently until the dough just comes together.
- Form the dough into a disk, wrap in plastic wrap, and refrigerate for 30 minutes.
Step 2: Roll and Cut the Dough
- Lightly flour your work surface and rolling pin.
- Roll the chilled dough out to about ⅛-inch thickness.
- Use a round cookie cutter (about 3 inches in diameter) to cut circles from the dough.
- Gently press each circle into your mini tart shell pan or muffin tin.
- Trim any excess dough from the edges with a sharp knife.
- Prick the bottom of each shell with a fork to prevent puffing.
Step 3: Chill and Prepare for Baking
- Place the filled mini tart shells pan in the freezer for 15 minutes.
- Meanwhile, preheat your oven to 375°F (190°C).
- Line each shell with small pieces of parchment paper.
- Fill with pie weights, dried beans, or rice to keep the shells from puffing up.
- This step is crucial for achieving perfectly shaped mini tart shells.
Step 4: Bake to Golden Perfection
- Bake the mini tart shells for 12-15 minutes until the edges just start to turn golden.
- Carefully remove the parchment and weights.
- Return to the oven for another 5-7 minutes until the bottoms are golden and crisp.
- Remove from the oven and let cool in the pan for 5 minutes.
- Gently transfer the baked shells to a cooling rack.
Expert Cooking Tips
Getting your mini tart shells just right involves a few key techniques that make all the difference:
- Keep Everything Cold: This is the golden rule for perfect pastry. Cold butter creates those flaky layers everyone loves. If your kitchen is warm, pop the flour in the freezer for 10 minutes before starting. When the butter stays cold, it creates steam pockets during baking that give you that crispy, tender texture.
- Don't Overwork the Dough: Mix just until the dough comes together. Overworking develops gluten, which makes your mini tart shells tough instead of tender. You should still see small pieces of butter in the dough; that's exactly what you want.
- The Fork Trick: Always dock your shells (prick them with a fork) before baking. This releases steam and prevents those annoying air bubbles that can ruin the shape. Make about 5-6 pricks in each shell bottom.
- Blind Baking Basics: Blind baking means baking the shells without filling first. It's essential for crispy results, especially with wet fillings. The freezing step before baking helps the shells hold their shape beautifully.
- Size Matters: If you don't have a mini tart pan, a standard muffin tin works great. Just adjust your circle cutter size to about 3.5 inches. For even smaller bite-sized options, use a mini muffin pan with 2-inch circles.
- Reroll Smartly: You can reroll dough scraps once, but be gentle. Press the scraps together rather than kneading them, then chill for 10 minutes before rolling again.
Recipe Variations & Substitutions
- Sweet Mini Tart Shells Add an extra tablespoon of sugar and a teaspoon of vanilla for sweeter shells perfect for fruit or cream fillings. These work beautifully as mini fruit tart shells or mini chocolate tart shells bases.
- Savory Mini Tart Shells Skip the sugar entirely and add dried herbs like thyme or rosemary. These make fantastic mini quiche tart shells or appetizer cups. Add a pinch of black pepper and some grated Parmesan for extra flavor.
- Chocolate Variation Replace 2 tablespoons of flour with cocoa powder for rich chocolate mini tart shells. These are perfect for mousse or ganache fillings. The chocolate flavor isn't overwhelming but adds a nice depth.
- Gluten-Free Option Use a 1:1 gluten-free baking flour blend. Add an extra tablespoon of cold butter and handle the dough very gently as gluten-free pastry is more delicate. You might need an extra teaspoon of ice water.
- Nut Flour Addition Replace ¼ cup of all-purpose flour with almond or hazelnut flour for a richer, more complex flavor. This works especially well for mini tart shells destined for chocolate or berry fillings.
- Vegan Mini Tart Shells Substitute the butter with cold vegan butter and replace the egg yolk with 2 tablespoons of ice water mixed with 1 teaspoon of apple cider vinegar. The texture is slightly different but still delicious.
- Make Them Fancy Brush the edges with egg wash before the final baking for extra shine. Sprinkle with coarse sugar for sweet versions or everything bagel seasoning for savory ones.
Equipment Recommendations
- Mini Tart Pan or Muffin Tin A 12-cup mini tart pan with removable bottoms makes life easiest, but a standard muffin tin works perfectly too. The removable bottoms let you pop out your mini tart shells without breaking them.
- Pastry Cutter A pastry cutter (or pastry blender) helps incorporate butter quickly without warming it with your hands. If you don't have one, use two forks or your fingertips, but work fast.
- Rolling Pin A standard rolling pin works fine, but a French-style pin without handles gives you better control when rolling thin. Keep it lightly floured to prevent sticking.
- Round Cookie Cutters Having a set of round cutters in different sizes lets you adjust for different pans. A 3-inch cutter is standard for most mini tart shells recipes.
- Pie Weights Ceramic pie weights are reusable and work perfectly. Dried beans or rice work just as well and cost less. Just save them in a jar labeled "pie weights" and reuse them indefinitely.
Storage & Meal Prep Tips
- Room Temperature Storage Unfilled baked mini tart shells stay fresh in an airtight container at room temperature for up to 5 days. Layer them between parchment paper to prevent sticking. They'll maintain their crispness beautifully.
- Freezing Baked Shells Cool completely, then freeze in a single layer on a baking sheet for 1 hour. Transfer to a freezer bag with parchment between layers. They keep for up to 3 months. Thaw at room temperature for 30 minutes before filling.
- Freezing Unbaked Dough The dough freezes brilliantly for up to 3 months. Wrap tightly in plastic wrap, then place in a freezer bag. Thaw overnight in the fridge before rolling. This is perfect for make-ahead mini tart shells prep.
- Freezing Formed Shells Press dough into pans, freeze until solid, then pop out and store in freezer bags. Bake straight from frozen, adding 2-3 minutes to the baking time. This method is a real time-saver for parties.
- Make-Ahead Strategy Bake your mini tart shells up to 2 days ahead. Store unfilled and fill just before serving to keep them crispy. If using wet fillings, brush the insides with melted chocolate first to create a moisture barrier.
- Keeping Them Crispy If your shells soften, crisp them up in a 300°F oven for 5 minutes. Let cool completely before filling. Never fill warm shells as the steam will make them soggy.
Grandma's Secret That Changed Everything
Here's something most recipes won't tell you about making perfect mini tart shells: freeze them twice. I learned this from my grandmother who made hundreds of these for church bake sales. After pressing the dough into the pans, freeze for 15 minutes. Then, after adding the weights, freeze again for 10 minutes before baking. This double freeze prevents shrinkage and gives you those pristine, professional-looking shells every single time.
The second secret? Add a tiny pinch of cream of tartar to your dough. About ⅛ teaspoon does the trick. It makes the mini tart shells extra tender and gives them a subtle tang that makes people wonder what your secret ingredient is. My grandmother swore by this, and now you know why her tarts were legendary. These two simple tricks transform good mini tart shells into absolutely outstanding ones that rival any bakery.
FAQ
What can I put in mini tart shells?
The possibilities are endless! For sweet options, try lemon curd, chocolate ganache, pastry cream with fresh fruit, key lime filling, or chocolate mousse. Savory options include quiche mixtures, cream cheese with herbs, caramelized onions with goat cheese, or smoked salmon with dill cream. Mini tart shells are incredibly versatile and work with virtually any filling you can imagine.
Do you need to blind bake mini tart shells?
Yes, blind baking is essential for crispy mini tart shells, especially with wet fillings. Bake them with weights first to prevent puffing and maintain their shape. For very dry fillings like thick ganache, you might skip this step, but blind baking generally gives you the best results and prevents soggy bottoms.
Does Walmart have tart shells?
Yes, Walmart typically carries pre-made tart shells in their freezer section or bakery area. However, homemade mini tart shells taste significantly better and give you control over ingredients. They're fresher, more buttery, and you can customize them to your needs; something store-bought versions can't match.
How do you store mini tart shells?
Store unfilled baked mini tart shells in an airtight container at room temperature for up to 5 days, or freeze for up to 3 months. Layer them with parchment paper to prevent sticking. Once filled, store in the refrigerator and consume within 2 days. The shells stay crispest when stored separately from fillings until serving time.
Time to Start Baking
Now you've got everything you need to make perfect mini tart shells that'll impress everyone. This recipe is your foundation for countless desserts and appetizers; from elegant mini fruit tart shells at summer parties to cozy mini quiche tart shells for brunch. The beauty of mastering mini tart shells is that once you nail the technique, you can experiment endlessly with different fillings and flavors.
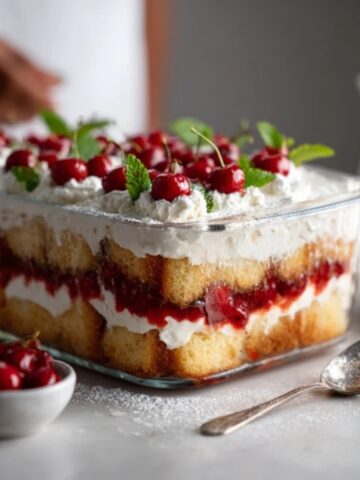
These buttery, crispy mini tart shells are about to become your go-to recipe for entertaining. They look impressive but are surprisingly simple to make. Whether you're filling them with something sweet or savory, homemade always beats store-bought. Ready to take your mini tart shells to the next level? Try our Mini Cakes Recipe for another bite-sized dessert option, or check out our Mini Pavlova Recipe for a show-stopping treat. Both pair beautifully with these versatile shells and will expand your repertoire of impressive mini desserts.
With love from my kitchen to yours,
Taylor Monroe
Related
Looking for other recipes like this? Try these:


Pairing
These are my favorite dishes to serve with this mini tart shells recipe:


Mini Tart Shells Recipe
Equipment
- Mini tart pan or muffin tin 12-cup pan preferred
- Rolling pin Lightly floured
- Round cookie cutter 3-inch diameter
- Pastry cutter For blending butter
- Fork To prick dough
- Parchment paper Cut into small squares
- Pie weights or dried beans For blind baking
Ingredients
- 1.5 cups all-purpose flour spoon and level
- 0.5 cup unsalted butter cold and cubed
- 0.25 cup granulated sugar omit for savory shells
- 1 large egg yolk room temperature
- 2-3 tablespoon ice water add as needed
- 0.25 teaspoon salt enhances flavor
- 0.5 teaspoon vanilla extract optional for sweet version
- 1 tablespoon cocoa powder optional for chocolate shells
- 2 tablespoon finely ground almonds optional for nutty flavor
- 1 teaspoon lemon zest optional for citrus variation
Instructions
- Combine flour, sugar, and salt. Cut in cold butter until crumbly.
- Add egg yolk and ice water until dough forms. Wrap and chill.
- Roll dough to ⅛-inch thickness; cut circles and press into mini tart pans.
- Prick bottoms with a fork; freeze for 15 minutes.
- Line with parchment; fill with pie weights.
- Bake at 375°F for 12–15 minutes, then remove weights and bake 5–7 more minutes.
- Cool completely on a wire rack before filling.


Leave a Reply