
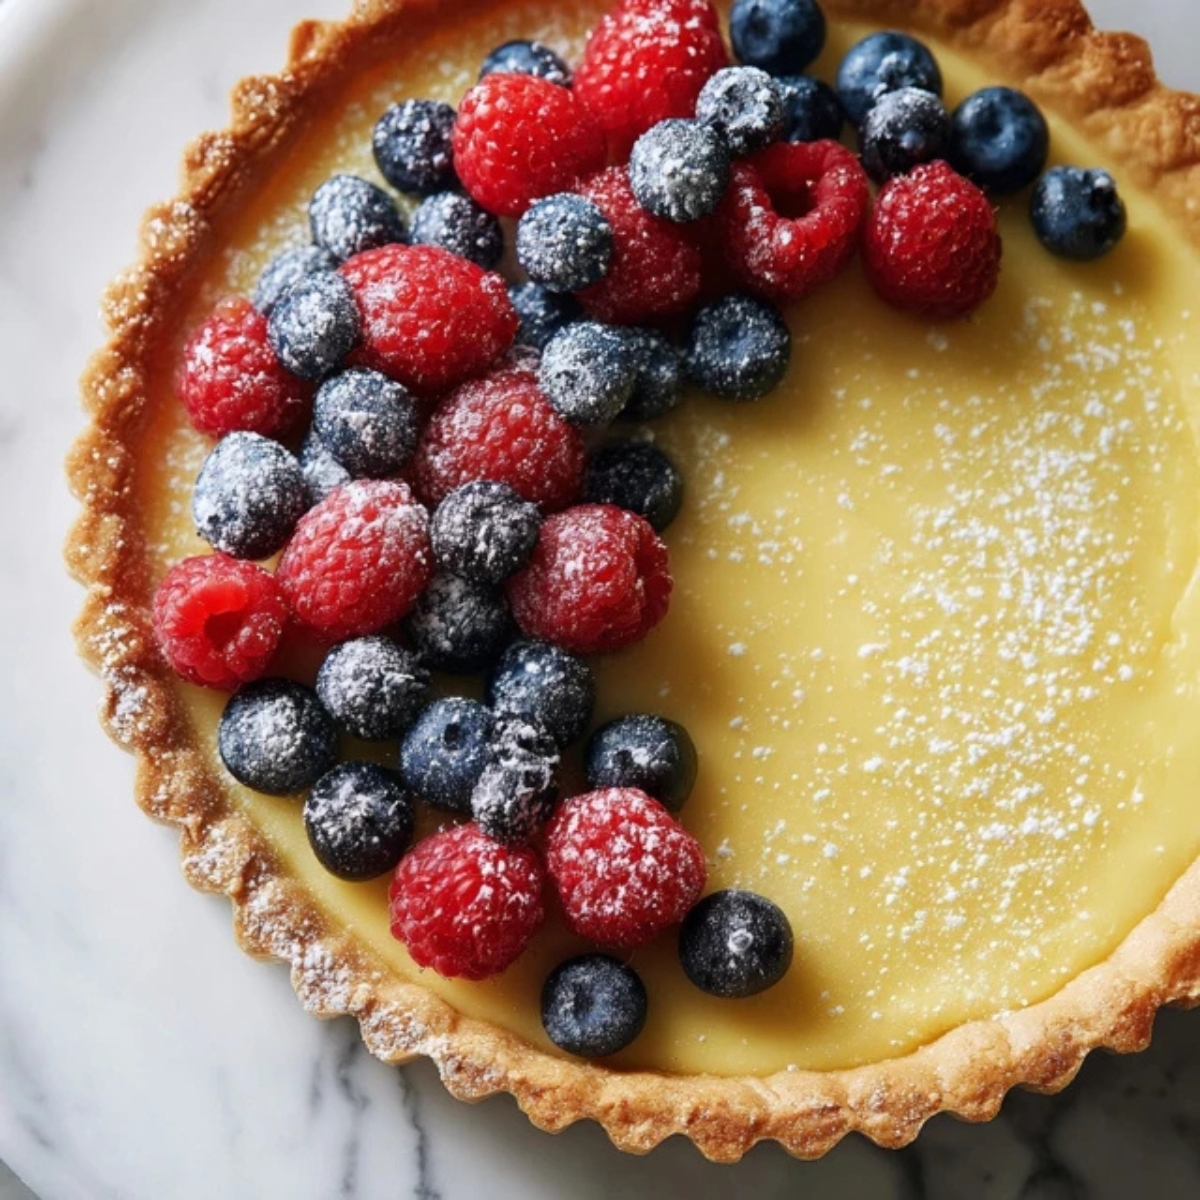
There's something magical about biting into a perfectly baked vanilla cream tart with its buttery, crisp shell and silky-smooth custard filling. These vanilla cream tarts are my absolute favorite dessert to serve at gatherings, and I'm so excited to share this foolproof recipe with you today. Whether you're hosting a fancy dinner party or just craving something sweet on a Tuesday afternoon, these vanilla cream tarts will become your new go-to dessert that never disappoints.
What I love most about this vanilla cream tarts recipe is how it looks incredibly fancy but is actually super simple to make. The combination of the flaky pastry crust with the rich, creamy vanilla custard creates a dessert that tastes like it came straight from a French bakery. Trust me, once you master these vanilla cream tarts, you'll be making them every week!
Background & Why These Tarts Will Steal Your Heart
The beauty of vanilla cream tarts lies in their versatility and timeless appeal. These elegant desserts have been a staple in European bakeries for centuries, and there's a good reason they've stood the test of time. The pure vanilla flavor lets the quality of your ingredients shine through, making each bite a celebration of simple, honest flavors.
What makes this vanilla cream tarts recipe truly special is how it balances texture and taste perfectly. The buttery shortbread crust provides the perfect foundation, staying crisp even after you add the luscious vanilla pastry cream. Unlike heavy desserts that leave you feeling stuffed, these vanilla cream tarts are light enough to enjoy any time of day. Plus, they're incredibly customizable; you can top them with fresh berries, chocolate shavings, or caramel drizzle to make them your own. The vanilla cream tarts you'll make today will quickly become a family favorite that everyone requests at every celebration.
Jump to:
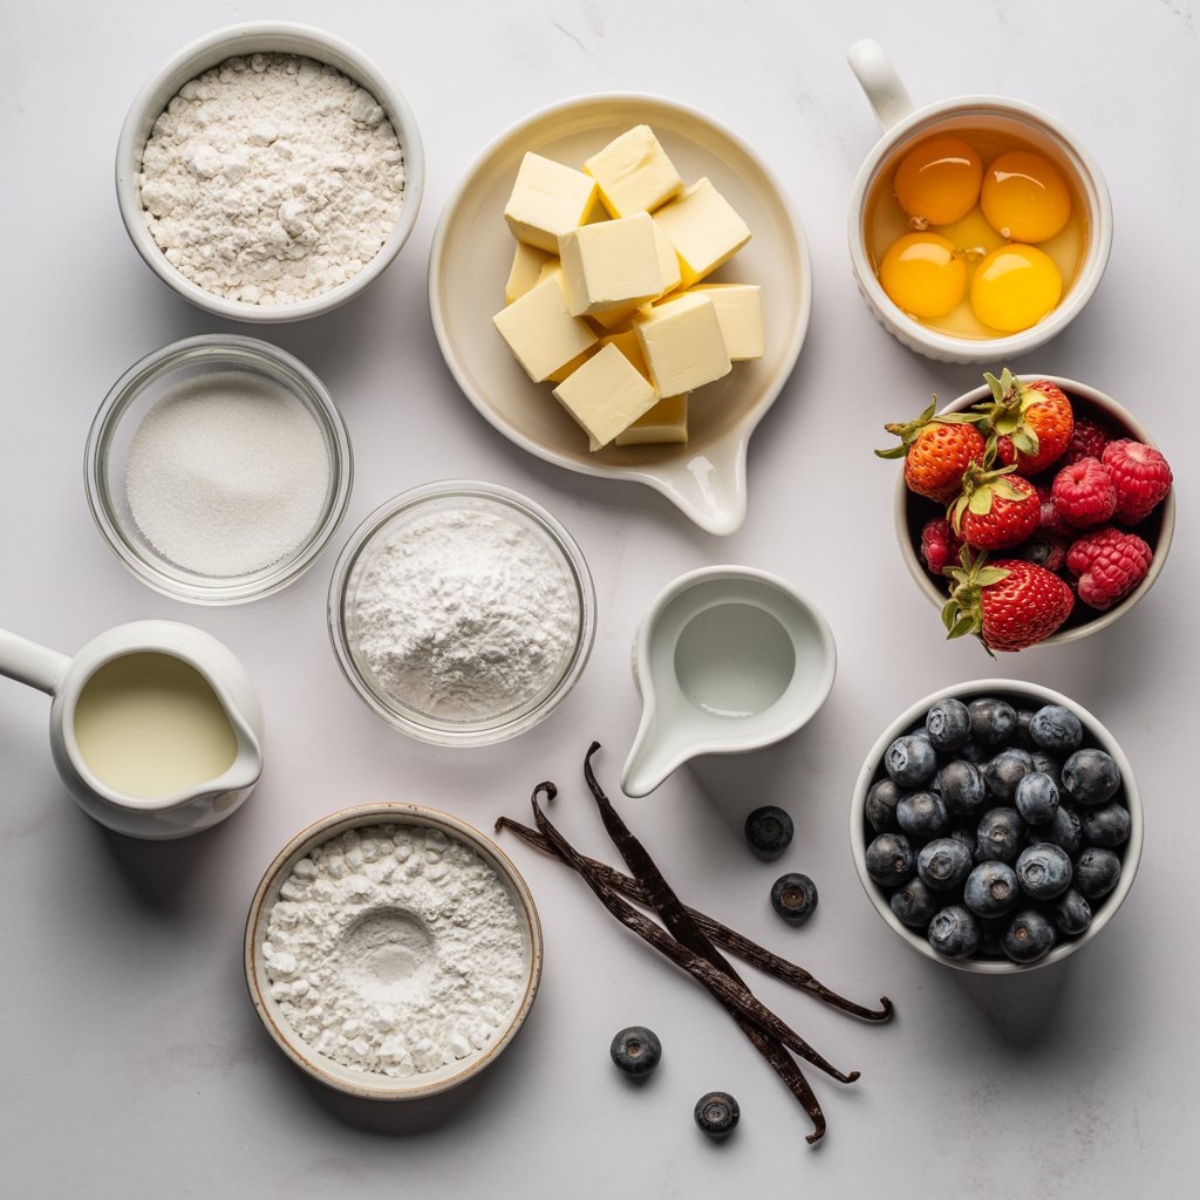
Ingredients
For the Tart Crust:
- All-purpose flour
- Unsalted butter, cold and cubed
- Powdered sugar
- Egg yolk
- Ice water
- Salt
- Vanilla extract
For the Vanilla Cream Filling:
- Whole milk
- Egg yolks
- Granulated sugar
- Cornstarch
- Unsalted butter
- Pure vanilla extract (or 1 vanilla bean, scraped)
- Pinch of salt
Optional Toppings:
- Fresh berries (raspberries, strawberries, blueberries)
- Powdered sugar for dusting
- Whipped cream
- Fresh mint leaves
See recipe card for quantities.
Instructions
Step 1: Prepare the Perfect Tart Crust
- Mix the flour, powdered sugar, and salt in a large bowl until well combined.
- Add the cold butter cubes and use a pastry cutter or your fingertips to work the butter into the flour until the mixture resembles coarse crumbs.
- Whisk together the egg yolk, vanilla extract, and 2 tablespoons of ice water in a small bowl.
- Pour the wet ingredients into the flour mixture and gently mix until the dough starts to come together.
- Add the remaining tablespoon of water if the dough feels too dry.
- Form the dough into a disk, wrap it in plastic wrap, and refrigerate for at least 30 minutes.
- Roll out the chilled dough on a lightly floured surface to about ⅛-inch thickness.
- Cut circles slightly larger than your tart pans and press them gently into the pans.
- Trim any excess dough and prick the bottoms with a fork to prevent puffing.
- Chill the prepared tart shells for 15 minutes while you preheat your oven to 350°F.
Step 2: Blind Bake for Maximum Crispness
- Line each tart shell with parchment paper and fill with pie weights or dried beans.
- Bake for 12-15 minutes until the edges start to turn golden.
- Remove the parchment and weights carefully.
- Return the tarts to the oven and bake for another 5-7 minutes until the bottoms are lightly golden.
- Let the tart shells cool completely on a wire rack before filling.
Step 3: Create Silky Vanilla Pastry Cream
- Heat the milk in a medium saucepan over medium heat until it just starts to simmer, then remove from heat.
- Whisk together the egg yolks, sugar, cornstarch, and salt in a separate bowl until smooth and pale yellow.
- Slowly pour about half of the hot milk into the egg mixture while whisking constantly to temper the eggs.
- Pour the tempered egg mixture back into the saucepan with the remaining milk.
- Cook over medium heat, whisking constantly, until the mixture thickens and starts to bubble (about 3-5 minutes).
- Remove from heat and whisk in the butter and vanilla extract until smooth and glossy.
- Strain the pastry cream through a fine-mesh sieve into a clean bowl to remove any lumps.
- Press plastic wrap directly onto the surface of the cream to prevent a skin from forming.
- Refrigerate for at least 2 hours until completely chilled and set.
Step 4: Assemble Your Vanilla Cream Tarts
- Whisk the chilled pastry cream until smooth and creamy.
- Transfer the cream to a piping bag fitted with a large round tip or a zip-top bag with the corner snipped off.
- Pipe or spoon the vanilla cream into each cooled tart shell, filling them generously.
- Smooth the tops with an offset spatula or the back of a spoon.
- Arrange your chosen toppings decoratively on each vanilla cream tart.
- Dust lightly with powdered sugar just before serving for an elegant finish.
Expert Cooking Tips
Making perfect vanilla cream tarts requires attention to a few key details that will elevate your results from good to absolutely amazing.
- Keep Everything Cold for Flaky Crust The secret to achieving that perfectly flaky, buttery tart crust is keeping your ingredients cold throughout the process. Use cold butter straight from the fridge, and don't be afraid to pop your dough back in the refrigerator if it starts getting too warm while you're working with it. This prevents the butter from melting before baking, which creates those beautiful, flaky layers.
- Temper Your Eggs Properly When making the pastry cream, tempering the eggs is crucial. This means gradually adding hot liquid to the eggs while whisking constantly. If you add the hot milk too quickly, you'll end up with scrambled eggs instead of smooth custard. Take your time with this step; it's worth the patience.
- Use Real Vanilla for Best Flavor While vanilla extract works wonderfully, using a real vanilla bean takes these vanilla cream tarts to the next level. Split the bean lengthwise, scrape out the seeds, and add both the seeds and the pod to your warming milk. The flavor is incomparably rich and aromatic.
- Strain for Silky Smoothness Always strain your pastry cream through a fine-mesh sieve after cooking. This removes any small lumps or bits of cooked egg, ensuring your filling is perfectly smooth and luxurious.
- Don't Skip the Blind Baking Blind baking the tart shells before adding the filling prevents soggy bottoms. The pie weights keep the dough from puffing up, and that second bake without weights ensures a golden, crispy base that stays crunchy even after adding the cream.
- Chill Before Serving These tarts taste best when the filling is completely set and chilled. Give them at least 2 hours in the refrigerator before serving. This allows the flavors to meld and the texture to become perfectly firm yet creamy.
Recipe Variations & Substitutions
- Chocolate Vanilla Swirl Tarts Melt 4 ounces of dark chocolate and swirl it into your vanilla cream before filling the tarts. This creates a beautiful marbled effect and adds a rich chocolate flavor that complements the vanilla perfectly.
- Berry Burst Vanilla Tarts Spread a thin layer of raspberry or strawberry jam on the bottom of your baked tart shells before adding the vanilla cream. Top with fresh berries for a fruity twist that adds both flavor and visual appeal.
- Lemon Vanilla Dream Tarts Add 2 tablespoons of fresh lemon zest and 2 tablespoons of lemon juice to your pastry cream for a bright, citrusy variation. The lemon cuts through the richness beautifully.
- Gluten-Free Option Replace the all-purpose flour in the crust with a 1:1 gluten-free baking flour blend. The texture will be slightly different but still delicious and crispy.
- Dairy-Free Alternative Use coconut milk instead of whole milk and coconut oil or vegan butter in place of regular butter. The coconut flavor adds a tropical twist to your vanilla cream tarts.
- Make-Ahead Individual Portions Use mini tart pans to create adorable individual servings. These are perfect for parties and can be made a day ahead. Just add fresh toppings right before serving.
- Caramel Vanilla Tarts Drizzle homemade or store-bought caramel sauce over the filled tarts and sprinkle with flaky sea salt for a sophisticated sweet-and-salty combination.
Equipment Recommendations
- 4-inch tart pans with removable bottoms (6-8 pans) ; makes removing the finished tarts so much easier without breaking them
- Pastry cutter or food processor ; quickly incorporates butter into flour for perfect crust texture
- Rolling pin and pastry mat ; ensures even dough thickness for uniform baking
- Pie weights or dried beans ; essential for proper blind baking to prevent puffing
- Fine-mesh strainer ; removes lumps for silky-smooth vanilla cream tarts
- Piping bag with round tip ; creates professional-looking, evenly filled tarts
- Wire cooling rack ; allows air circulation for crispy bottoms
- Heavy-bottomed saucepan ; distributes heat evenly when making pastry cream
Storage & Meal Prep Tips
- Refrigerator Storage Store your assembled vanilla cream tarts in an airtight container in the refrigerator for up to 3 days. Place parchment paper between layers if stacking to prevent the tarts from sticking together. The crust will stay relatively crisp if stored properly, though it's always best enjoyed within the first day or two.
- Freezing Components Separately You can freeze the baked, unfilled tart shells for up to 2 months. Wrap each shell individually in plastic wrap, then place them all in a freezer-safe bag. The pastry cream can also be frozen for up to 1 month in an airtight container. Thaw both components in the refrigerator overnight before assembling your vanilla cream tarts.
- Make-Ahead Strategy Prepare the tart shells and pastry cream a day ahead. Store the shells at room temperature in an airtight container and the cream in the refrigerator. Assemble the vanilla cream tarts the morning of serving for the freshest taste and best texture.
- Topping Timing If using fresh fruit as a topping, add it just before serving to prevent the berries from releasing juice and making the cream watery. You can prepare a light fruit glaze by warming apricot jam with a splash of water, which helps seal the berries and gives them a beautiful shine.
- Portion Control Prep Make mini versions using 2-inch tart pans for perfect portion-controlled desserts. These freeze beautifully when wrapped individually and make grab-and-go treats or elegant additions to lunch boxes.
Grandma's Secret That Changed Everything
Here's the game-changing tip that transformed my vanilla cream tarts from ordinary to extraordinary: add a tablespoon of cream cheese to your pastry cream while it's still warm. This secret ingredient creates an incredibly rich, tangy depth that makes everyone wonder what makes your vanilla cream tarts taste so much better than anyone else's. The cream cheese adds body and a subtle tanginess that balances the sweetness perfectly.
Another trick I learned is to brown the butter slightly before adding it to the pastry cream. This adds a nutty, caramel-like flavor that elevates the entire dessert. Just heat the butter in a small pan until it turns golden brown and smells heavenly, then whisk it into your finished vanilla cream tarts filling. These two simple tweaks will have people begging for your recipe, and you can smile knowing you've got a delicious secret up your sleeve.
FAQ
How long can you keep custard tart in the fridge?
Custard tarts, including vanilla cream tarts, can be stored in the refrigerator for up to 3 days when kept in an airtight container. For best quality and texture, enjoy them within 2 days of making. The crust stays crispest on the first day, though proper storage helps maintain freshness.
What is a trivia about tarts?
The word "tart" comes from the Old French word "tarte," and tarts have been enjoyed since medieval times. Interestingly, tarts were originally savory dishes before sweet versions like vanilla cream tarts became popular. In some regions, the difference between a pie and a tart is simply that tarts have open tops and are typically served in individual portions.
What are the four types of tarts?
The four main types of tarts are: fruit tarts (topped with fresh or cooked fruit), custard tarts (like vanilla cream tarts with creamy fillings), nut tarts (featuring pecans, walnuts, or almonds), and savory tarts (filled with vegetables, cheese, or meat). Each type offers unique flavors and textures.
How long do tarts last in the fridge?
Tarts generally last 2-3 days in the refrigerator when stored properly in an airtight container. Cream-filled tarts like vanilla cream tarts are best consumed within 2 days, while fruit tarts with pastry cream should be eaten within 1-2 days. Unfilled baked tart shells can be stored at room temperature for up to 5 days.
Conclusion: Your New Signature Dessert Awaits
Now that you've mastered this vanilla cream tarts recipe, you have a versatile dessert that's perfect for any occasion. These elegant tarts look impressive but are surprisingly simple to make, and the combination of buttery crust with silky vanilla custard never fails to impress guests. The best part about vanilla cream tarts is how easily you can customize them with different toppings and variations to suit your mood or the season.
I encourage you to make these vanilla cream tarts this weekend and see for yourself why they've become such a beloved classic. Once you've perfected your technique, try exploring other delicious tart variations like the Portuguese Custard Tarts Recipe for a caramelized twist on custard desserts, or the Raspberry Almond Tart Recipe for a fruity, nutty alternative. Both recipes build on the same techniques you've learned here, so you'll feel confident tackling them. Happy baking, and enjoy every creamy, delicious bite of your homemade vanilla cream tarts!
With love from my kitchen to yours,
Aubrey James
Related
Looking for other recipes like this? Try these:


Pairing
These are my favorite dishes to serve with this vanilla cream tarts recipe:


Vanilla Cream Tarts Recipe
Equipment
- Tart pans with removable bottoms
- Pastry cutter or food processor
- Rolling pin
- Pie weights or dried beans
- Fine-mesh strainer
- Piping bag with round tip
- Wire cooling rack
- Heavy-bottomed saucepan
Ingredients
Tart Crust
- 1 ½ cups all-purpose flour
- ½ cup unsalted butter cold and cubed
- ¼ cup powdered sugar
- 1 large egg yolk
- 2–3 tablespoon ice water
- ¼ teaspoon salt
- ½ teaspoon vanilla extract
Vanilla Cream Filling
- 2 cups whole milk
- 4 large egg yolks
- ½ cup granulated sugar
- ¼ cup cornstarch
- 2 tablespoon unsalted butter
- 2 teaspoon pure vanilla extract or 1 vanilla bean, scraped
- 1 pinch salt
Optional Toppings
- Fresh berries raspberries, strawberries, blueberries
- Powdered sugar for dusting
- Whipped cream
- Fresh mint leaves
Instructions
- Mix flour, sugar, salt, and butter until crumbly. Add yolk, vanilla, and water. Form into disk and chill.
- Roll out dough, cut circles, and press into tart pans. Chill 15 min.
- Line with parchment and weights. Bake 12–15 min, remove weights, bake 5–7 more. Cool completely.
- Warm milk in saucepan until simmering.
- In bowl, whisk yolks, sugar, cornstarch, and salt.
- Slowly whisk hot milk into yolk mixture. Return to pan, cook until thick.
- Remove from heat, whisk in butter and vanilla. Strain, cover with wrap, chill 2 hrs.
- Whisk chilled cream smooth, pipe into tart shells, top with fruit, dust with sugar.


Leave a Reply