
You're at a fall gathering, and everyone's reaching for the same dessert. That's what happens with caramel apple dessert cups. These little beauties combine everything we love about autumn in one adorable cup. We're talking creamy, crunchy, sweet, and satisfying all at once. The best part? You don't need fancy baking skills to pull off caramel apple dessert cups that'll have people asking for your recipe. Whether you're prepping for Thanksgiving, a Halloween party, or just a regular Tuesday night, caramel apple dessert cups are your new go-to move.
These caramel apple dessert cups work for basically any occasion. They're small enough to feel fancy, easy enough to make on a weeknight, and they actually taste like you spent hours in the kitchen. Plus, you can make them ahead and just grab them from the fridge when guests arrive. Caramel apple dessert cups are the kind of recipe that makes you look like a dessert pro without the stress.

Background & Why This Recipe Stands Out
Fall isn't complete without caramel and apple desserts, and caramel apple dessert cups bring that magic into individual servings that are downright irresistible. These cups hit different than your standard apple pie or caramel apple; they're layered, portable, and way more fun to eat. Each spoonful gives you a little bit of everything; the buttery cookie base, creamy filling, fresh apples, and that caramel drizzle that ties it all together.
What makes caramel apple dessert cups such a win is their versatility and ease. You're not spending hours at the stove or wrestling with pie crust. Most versions are no-bake, meaning you can prep them while watching your favorite show. They also work beautifully for meal prep; make a batch on Sunday, and you've got desserts ready to go all week. Caramel apple dessert cups fit perfectly into modern busy lives because they're make-ahead friendly and actually taste better after they've been chilling for a bit. Plus, they're way more Instagram-worthy than throwing a slice of pie on a plate.
Jump to:
- Background & Why This Recipe Stands Out
- Ingredients
- Instructions
- Expert Cooking Tips
- Recipe Variations & Substitutions
- Equipment Recommendations
- Storage & Meal Prep Tips
- Grandma's Secret That Changed Everything
- FAQ
- Why Caramel Apple Dessert Cups Deserve a Spot on Your Table
- Related
- Pairing
- Caramel Apple Dessert Cups Recipe
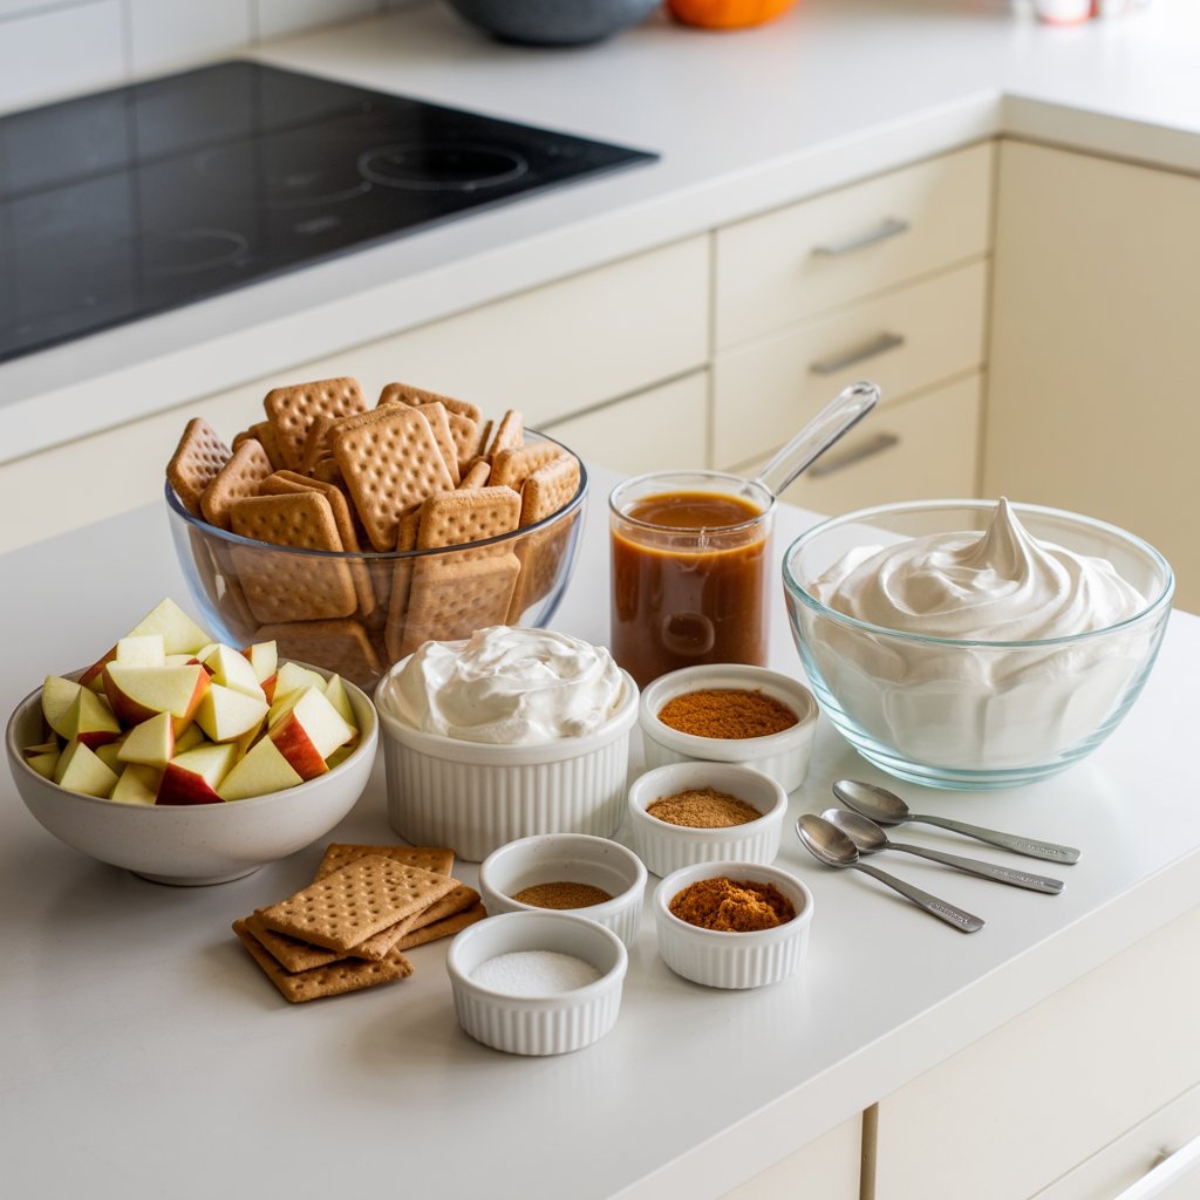
Ingredients
Cookie Crust Layer
- Crushed vanilla wafers
- Melted butter
- Brown sugar
Cream Cheese Layer
- Cream cheese; softened
- Powdered sugar
- Vanilla extract
Apple & Caramel Layer
- Apples; peeled and diced into small chunks
- Brown sugar
- Ground cinnamon
- Nutmeg
- Caramel sauce
- Topping Layer
- Whipped cream
- Caramel sauce for drizzling
- Crushed graham crackers
- Pinch of sea salt
Why These Ingredients Matter: Vanilla wafers create a sturdy base that doesn't get soggy too quickly. Fresh diced apples provide natural sweetness and texture; and good quality caramel sauce makes a huge difference in taste. The cream cheese layer acts as a barrier that keeps your caramel apple dessert cups from getting watery while adding richness.
See recipe card for quantities.
Instructions
Step 1; Prepare Your Cups & Crust Base
- Grab 4 clear cups or mason jars (8-ounce size works perfectly). If you don't have clear cups, small bowls work just fine; you just won't get that pretty layered look.
- Mix crushed vanilla wafers with melted butter and brown sugar in a small bowl until it looks like wet sand.
- Divide the mixture evenly among your four cups; pressing it gently onto the bottom to create a firm base. This foundation is what keeps your caramel apple dessert cups structurally sound, so don't skip the pressing step.
Step 2; Create the Creamy Layer
- In a separate bowl; beat together softened cream cheese; powdered sugar; and vanilla extract until smooth and fluffy (about 2 minutes).
- Divide the cream cheese mixture evenly; spooning it over the cookie layer in each cup. Use the back of a spoon to spread it gently so you don't disturb the crust below.
- This layer is your secret weapon in making caramel apple dessert cups taste incredible; it adds richness while protecting the base from getting soggy.
Step 3; Layer in the Apple-Cinnamon Mixture
- In a bowl; toss your diced apples with brown sugar; cinnamon; and nutmeg.
- Divide the apple mixture equally among your cups; spooning it over the cream cheese layer. The apples will settle down slightly; which is perfect.
- Drizzle each cup with about 2 teaspoons of caramel sauce; letting it seep into the apple layer slightly.
Step 4; Top it Off with the Final Layer
- Top each caramel apple dessert cups serving with a dollop of whipped cream (about ¼ cup per cup).
- Drizzle extra caramel sauce over the whipped cream in a decorative pattern.
- Sprinkle crushed graham crackers on top for crunch; then finish with just a tiny pinch of sea salt to make all the flavors pop.
- Refrigerate for at least 30 minutes before serving (though they're even better after a couple of hours).
Expert Cooking Tips
- The Apple Selection Tip Choose apples that are slightly firm; like Honeycrisp or Granny Smith varieties. Softer apples like Red Delicious can get mushy in caramel apple dessert cups during storage. The firmness helps them hold their shape and texture for days.
- Timing Your Assembly Don't assemble your caramel apple dessert cups more than 4 hours before serving. While the base and cream cheese layers can sit longer; the apples and caramel are best when relatively fresh.
- Caramel Sauce Hack Use store-bought caramel sauce to save time and reduce stress. Quality matters though; grab the good stuff from the baking aisle rather than the cheap chocolate syrup variety. Your caramel apple dessert cups deserve real caramel.
- Preventing Soggy Bottoms Let your cookie crust layer sit for 5 minutes after pressing it down before adding the cream cheese. This helps it firm up slightly and prevents the bottom of your caramel apple dessert cups from becoming soggy too quickly.
- Make-Ahead Storage You can assemble the crust and cream cheese layers up to 24 hours ahead. Add the apples and caramel within 4 hours of serving for best results. This makes caramel apple dessert cups perfect for meal prep.
Recipe Variations & Substitutions
No-Bake Alternatives to Vanilla Wafers
If you don't have vanilla wafers on hand; crushed gingersnaps add a nice spiced kick to your caramel apple dessert cups. Graham crackers work too; though they're a bit more neutral. Even crushed cinnamon cereal can do the job in a pinch; creating a sweeter base that pairs well with caramel apples.
Mix your chosen base with melted butter; and you've got yourself a solid foundation for caramel apple dessert cups. The key is keeping that moisture-to-crumb ratio balanced.
Cream Cheese Substitutions
Mascarpone cheese creates an even creamier layer than traditional cream cheese for your caramel apple dessert cups. You can also use Greek yogurt mixed with a bit of honey if you want a lighter version. Both options work beautifully and give slightly different flavor profiles while keeping the recipe easy.
Apple Variations
Beyond standard apples; try mixing in dried cranberries or raisins for extra tartness in your caramel apple dessert cups. Pear chunks work wonderfully too; giving you a more sophisticated fall dessert. Some people even add a tablespoon of apple cider or apple juice to the apple mixture for deeper flavor.
Whipped Cream Alternatives
Swap whipped cream for a dollop of vanilla pudding; butterscotch pudding; or even a bit of whipped mascarpone for your caramel apple dessert cups topping. Each option brings something different; whether it's extra sweetness or more sophistication.
Gluten-Free Version
Replace vanilla wafers with crushed gluten-free vanilla cookies or almond flour mixed with melted butter and brown sugar. Everything else stays the same; so your caramel apple dessert cups remain just as delicious and now accessible for your gluten-free friends.
Equipment Recommendations
- Clear Glass Cups or Mason Jars - 8-ounce size is ideal for showing off those beautiful caramel apple dessert cups layers. The clear glass lets everyone see exactly what they're getting.
- Mixing Bowls - You'll need at least 2-3 for different layers. Stainless steel or glass both work great and don't react with acidic apples.
- Electric Mixer or Whisk - An electric mixer makes the cream cheese layer perfectly fluffy for your caramel apple dessert cups; but a good whisk works if that's all you have.
- Measuring Spoons and Cups - Precision matters here; especially with caramel to keep your caramel apple dessert cups balanced.
- Sharp Knife - A good knife makes quick work of dicing apples for your caramel apple dessert cups. Dull knives take forever and make a mess.
Storage & Meal Prep Tips
Refrigerator Storage
Caramel apple dessert cups stay fresh in the fridge for up to 3 days when properly stored. Keep them in an airtight container on a shelf rather than the door; where temperature fluctuates. If you're stacking them; place parchment paper between layers so they don't stick together.
The apples will naturally soften slightly over time; which some people actually prefer. The flavors meld together beautifully after a day or two; making your caramel apple dessert cups even more delicious.
Freezing Your Caramel Apple Dessert Cups
You can freeze the crust and cream cheese layers separately up to 2 weeks ahead. Don't freeze the assembled caramel apple dessert cups with apples; as the texture gets weird. Instead; keep components separate and assemble fresh; or add apples and caramel no more than 4 hours before eating.
Make-Ahead Game Plan
Sunday prep version; make crusts and cream cheese layers; store separately. Wednesday assembly; add apples and caramel 4 hours before a party. Your caramel apple dessert cups will be ready to impress without last-minute stress.
Transporting Your Desserts
If you're bringing caramel apple dessert cups to a gathering; use a muffin tin with paper liners to keep cups stable during transport. Place them on a flat surface in your car; never stacking them. Most caramel apple dessert cups travel beautifully when handled carefully.
Grandma's Secret That Changed Everything
The real magic in caramel apple dessert cups isn't any single ingredient; it's understanding why each layer exists. Your grandmother probably knew that a good dessert has balance; texture; and layers that work together. The cookie base absorbs moisture without getting mushy because of that cream cheese barrier. The caramel apple dessert cups are structured for success from the bottom up.
The second secret most people miss is the sea salt on top. Just one tiny pinch completely transforms your caramel apple dessert cups by making every flavor pop. The salt doesn't make it taste salty; it amplifies the sweet and creamy notes. This small addition turns a good caramel apple dessert cups recipe into one people remember and request repeatedly.
FAQ
Does a caramel apple need to be refrigerated?
Yes; caramel apple dessert cups should be refrigerated after assembly. While a traditional caramel apple on a stick can sit at room temperature for a few hours; caramel apple dessert cups with cream cheese definitely need chilling. The cream cheese layer keeps everything fresh and prevents spoilage.
Does caramel apple dip need to be refrigerated after opening?
Your caramel apple dip doesn't always require refrigeration after opening if you're using it within a few days; but it's safer to refrigerate your caramel apple dessert cups. Store-bought caramel has preservatives; but homemade versions should definitely be chilled to prevent bacterial growth.
Does caramel apple pie need to be refrigerated?
Traditional caramel apple pie with a cooked filling can sit at room temperature for up to 24 hours; but your caramel apple dessert cups with fresh cream cheese should be refrigerated immediately after assembly.
How to keep a caramel apple fresh after cutting?
Once you've cut into your caramel apple dessert cups; keep them cold and covered. The exposed apple flesh will oxidize and brown if left uncovered; which is why your caramel apple dessert cups stay better looking when sealed in the fridge. Eat within 3 days for best quality.
Why Caramel Apple Dessert Cups Deserve a Spot on Your Table
From Halloween parties to Thanksgiving dinners; caramel apple dessert cups bring that cozy fall feeling in individual servings everyone loves. They're impressive enough for guests; easy enough for weeknights; and flexible enough to adapt to whatever you have in your pantry. Your caramel apple dessert cups don't require baking skills; special equipment; or hours of preparation time.
Make your first batch this week; and we guarantee you'll be making caramel apple dessert cups on repeat through the entire fall season. Your family will thank you; your guests will ask for the recipe; and you'll wonder why you didn't discover this dessert years ago. Grab your cups; your apples; and that caramel sauce; because these caramel apple dessert cups are about to become your new favorite go-to.
Take it Further: Try our Apple Crumble Cheesecake Recipe for another impressive layered dessert; or go bold with Apple Pie Bombs Recipe for a portable version that's perfect for picnics and potlucks.
With love from my kitchen to yours,
Kaitlyn Reed
Related
Looking for other recipes like this? Try these:


Pairing
These are my favorite dishes to serve with this caramel apple dessert cups recipe:


Caramel Apple Dessert Cups Recipe
Equipment
- 4 Clear glass cups or mason jars 8-ounce size to show layered effect
- 3 Mixing bowls Separate for crust, filling, and apples
- 1 Electric mixer or whisk To fluff the cream cheese layer
- 1 set Measuring cups and spoons For accurate ratios
- 1 Sharp knife For dicing apples evenly
Ingredients
Cookie Crust Layer
- 1.5 cups crushed vanilla wafers Crushed finely
- 4 tablespoon butter Melted
- 2 tablespoon brown sugar Adds flavor depth
Cream Cheese Layer
- 8 oz cream cheese Softened
- 0.25 cup powdered sugar Sweetens the layer
- 0.5 teaspoon vanilla extract Adds aroma
Apple & Caramel Layer
- 2 medium apples Peeled and diced
- 3 tablespoon brown sugar To sweeten apples
- 0.5 teaspoon ground cinnamon Warm spice
- 0.25 teaspoon nutmeg Optional, adds depth
- 2 tablespoon caramel sauce For drizzling over apples
Topping Layer
- 1 cup whipped cream Fresh or store-bought
- 0.25 cup caramel sauce For topping drizzle
- 0.25 cup crushed graham crackers For texture
- 1 pinch sea salt To balance sweetness
Instructions
- Mix crushed vanilla wafers, melted butter, and brown sugar. Press into cups to form base.
- Beat cream cheese, powdered sugar, and vanilla until fluffy. Spread over crust layer.
- Toss diced apples with brown sugar, cinnamon, and nutmeg. Spoon over cream layer and drizzle caramel sauce.
- Top each cup with whipped cream, caramel drizzle, crushed graham crackers, and a pinch of sea salt.
- Chill for at least 30 minutes before serving for best flavor.


Leave a Reply