
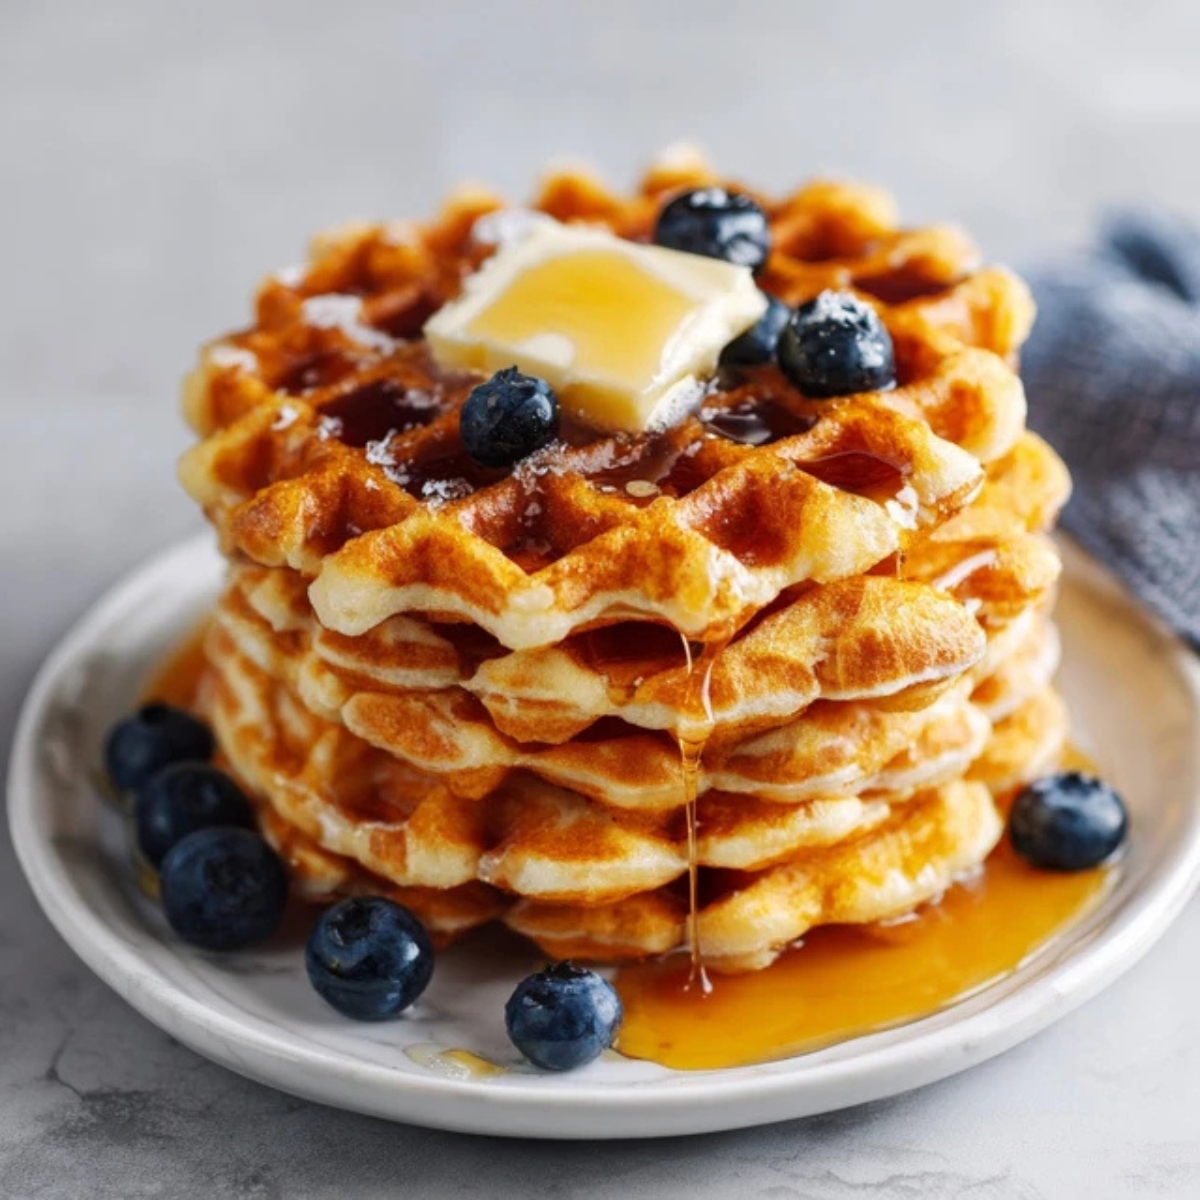
There's nothing quite like waking up to the smell of fresh waffles cooking on a Sunday morning. If you're following a gluten-free diet, you don't have to miss out on this beloved breakfast tradition. These gluten free waffles are everything you want them to be: golden and crispy on the outside, light and fluffy on the inside, and absolutely delicious. Whether you're new to gluten-free cooking or you've been making gluten free waffles for years, this recipe will become your go-to weekend breakfast.
What makes these gluten free waffles special is how simple they are to make. You don't need fancy ingredients or complicated techniques; just mix, pour, and cook. The result is a stack of beautiful waffles that taste so good, nobody will ever guess they're gluten free waffles. They're perfect for meal prep too, so you can enjoy homemade waffles any day of the week.
Background & Why This Recipe Creates Restaurant-Quality Waffles at Home
The secret to amazing gluten free waffles lies in understanding how gluten-free flours work differently from regular wheat flour. Traditional waffles get their structure from gluten, which creates those perfect air pockets and crispy edges. When making gluten free waffles, we need to recreate that texture using a blend of flours and the right technique. This recipe has been tested and perfected to give you that classic waffle experience without any gluten.
What sets these gluten free waffles apart from store-bought versions is the freshness and customization you get from making them yourself. Many commercial options are dry or cardboard-like, but homemade gluten free waffles are tender, flavorful, and can be adapted to your taste preferences. Plus, you control exactly what goes into your breakfast; no preservatives, no mystery ingredients, just wholesome food that happens to be free from gluten. These gluten free waffles pair beautifully with fresh berries, maple syrup, or even as a base for savory toppings like fried chicken.
Jump to:
- Background & Why This Recipe Creates Restaurant-Quality Waffles at Home
- Ingredients
- Instructions
- Recipe Variations & Substitutions
- Equipment Recommendations
- Storage & Meal Prep Tips
- The Golden Ratio Secret That Changes Everything
- FAQ
- Start Your Weekend Right with These Delicious Waffles
- Related
- Pairing
- Gluten-Free Waffles Recipe
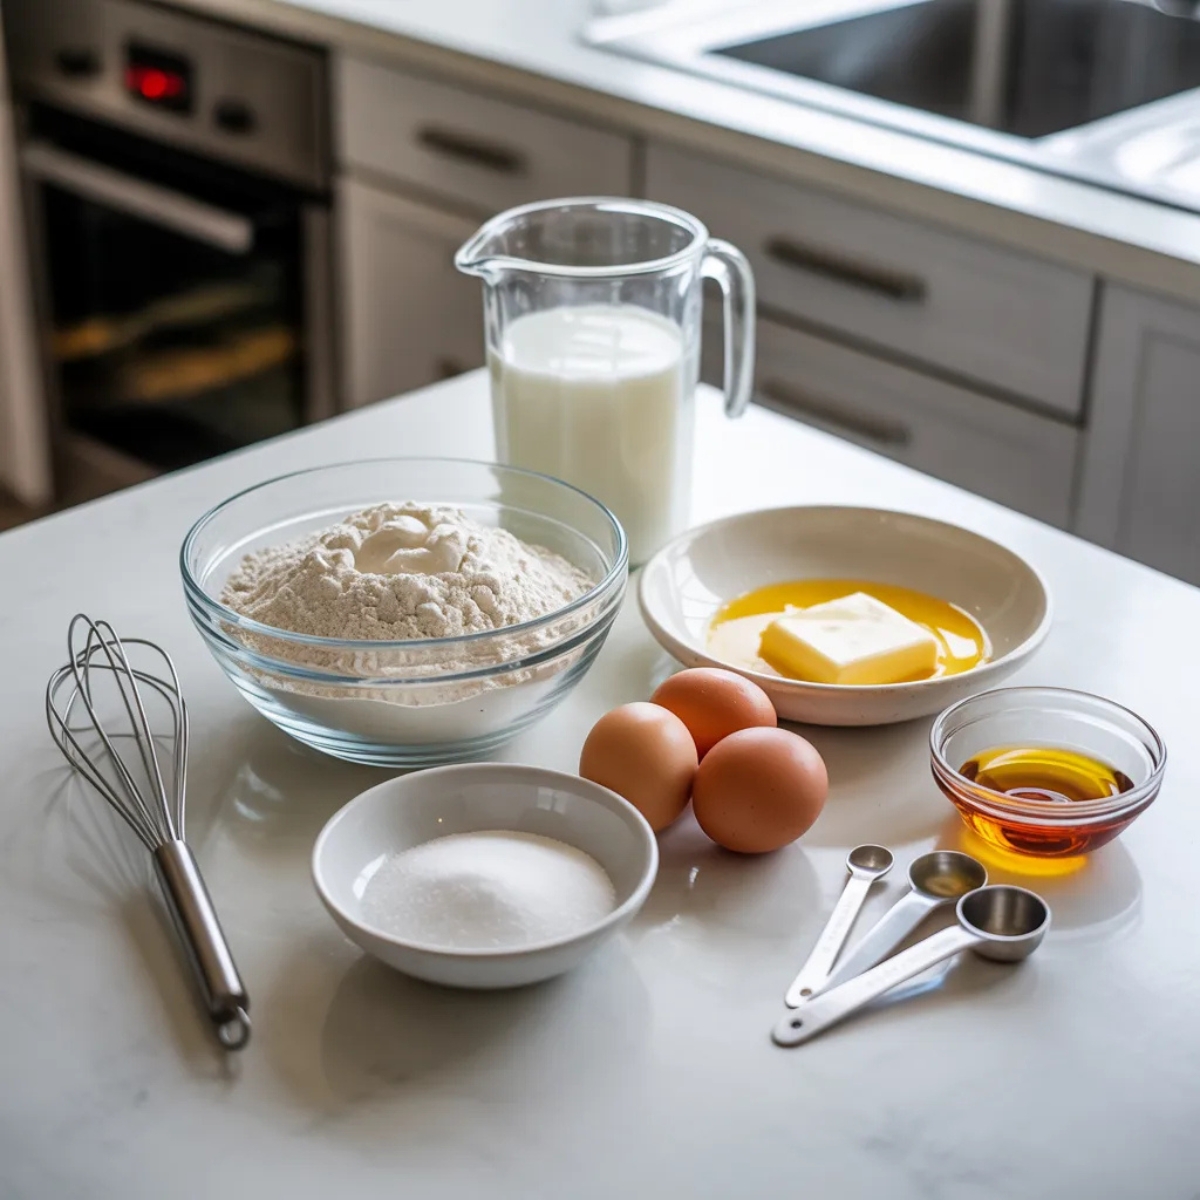
Ingredients
Dry Ingredients
- Gluten-free all-purpose flour blend (with xanthan gum included)
- Sugar (or coconut sugar for refined sugar-free option)
- Baking powder
- Baking soda
- Salt
- Cinnamon (optional, for extra flavor)
Wet Ingredients
- Eggs (room temperature works best)
- Buttermilk (or dairy-free milk with 1 tablespoon vinegar)
- Melted coconut oil or butter
- Vanilla extract
Ingredient Notes: The gluten-free flour blend is crucial; look for one that already contains xanthan gum, which helps bind the ingredients. Buttermilk adds tanginess and helps create tender gluten free waffles, but you can easily make a dairy-free version. Room temperature eggs mix more smoothly into the batter.
See recipe card for quantities.
Instructions
Step 1: Prepare Your Ingredients and Waffle Maker
- Preheat your waffle maker according to manufacturer's instructions (usually medium-high heat).
- Gather all ingredients and measuring tools to make the process smooth.
- Bring eggs and buttermilk to room temperature by letting them sit out for 15 minutes.
- Melt the coconut oil or butter and let it cool slightly so it doesn't cook the eggs.
- Lightly grease the waffle maker with cooking spray or brush with oil.
Step 2: Mix the Dry Ingredients
- In a large mixing bowl, whisk together the gluten-free flour blend, sugar, baking powder, baking soda, and salt.
- Make sure there are no lumps in the flour by sifting if necessary.
- Add cinnamon if using and whisk until everything is evenly distributed.
- Create a well in the center of the dry ingredients for easier mixing.
Step 3: Combine Wet Ingredients and Create the Batter
- In a separate medium bowl, whisk the eggs until slightly frothy.
- Add buttermilk, melted coconut oil, and vanilla extract to the eggs and whisk until combined.
- Pour the wet ingredients into the well of the dry ingredients.
- Stir gently with a spatula or wooden spoon until just combined; don't overmix.
- Let the batter rest for 5 minutes to allow the flour to absorb the liquid and the leavening agents to activate.
- The batter should be thick but pourable; add a splash of milk if it's too thick.
Step 4: Cook Your Perfect Gluten Free Waffles
- Pour the recommended amount of batter onto the center of the preheated waffle maker (usually ½ to ¾ cup depending on size).
- Close the lid and cook according to your waffle maker's settings, typically 3-5 minutes.
- Avoid opening the waffle maker too early; wait until steam stops escaping for the crispiest results.
- Carefully remove the waffle with a fork or silicone spatula.
- Place finished gluten free waffles on a wire rack in a 200°F oven to keep warm and crispy while you cook the remaining batter.
- Repeat with remaining batter, re-greasing the waffle maker between batches if needed.
Expert Cooking Tips
Getting perfect gluten free waffles every time comes down to mastering a few key techniques. Here's what professional bakers know:
- Temperature Control is Everything Make sure your waffle maker is fully preheated before adding batter. A properly heated surface creates that golden, crispy exterior that makes gluten free waffles irresistible. If your first waffle doesn't turn out perfectly, adjust the heat setting; every waffle maker runs differently.
- Don't Overmix the Batter When combining wet and dry ingredients, stir just until you don't see dry flour anymore. Some small lumps are fine and actually preferred. Overmixing develops too much structure in gluten-free batters, making your waffles dense instead of light.
- The Resting Period Makes a Difference Those 5 minutes of resting time allow the gluten-free flour to fully hydrate and the baking powder to start working. This simple step improves texture dramatically.
- Proper Greasing Prevents Sticking Even non-stick waffle makers need a light coating of oil or spray. For the crispiest results, use a brush to apply melted coconut oil between batches.
- Use the Steam as Your Timer When steam stops coming out of your waffle maker, your gluten free waffles are usually done. Opening too early causes them to tear and stick.
- Keep Them Crispy While Cooking in Batches Place finished waffles directly on a wire rack in a low oven rather than stacking them. Stacking creates steam that makes them soggy.
Recipe Variations & Substitutions
One of the best things about this recipe is how adaptable it is to different dietary needs and flavor preferences. Here are proven variations:
Dairy-Free Version Replace buttermilk with your favorite dairy-free milk mixed with 1 tablespoon of apple cider vinegar or lemon juice. Let it sit for 5 minutes before using. Swap the butter for coconut oil or vegan butter. These gluten free waffles turn out just as delicious.
Egg-Free Option Use flax eggs (1 tablespoon ground flaxseed mixed with 3 tablespoons water per egg, let sit 5 minutes) or commercial egg replacer. The texture will be slightly different but still delicious.
Flavor Variations
- Blueberry: Fold 1 cup fresh or frozen blueberries into the batter
- Chocolate Chip: Add ½ cup mini chocolate chips for dessert-worthy waffles
- Banana: Mash 1 ripe banana into the wet ingredients for natural sweetness
- Pumpkin Spice: Replace ½ cup buttermilk with pumpkin puree and add pumpkin pie spice
- Lemon Poppy Seed: Add 2 tablespoons lemon zest and 1 tablespoon poppy seeds
Flour Substitutions While a store-bought blend works best, you can create your own: combine 1 cup rice flour, ½ cup potato starch, ¼ cup tapioca flour, and ¼ cup almond flour, plus 1 teaspoon xanthan gum. For oat flour gluten free waffles, use certified gluten-free oats ground into flour.
Sugar Alternatives Swap regular sugar for maple syrup (reduce liquid by 2 tablespoons), honey, or stevia for sugar-free gluten free waffles.
Equipment Recommendations
Waffle Maker A quality waffle maker is essential for perfect gluten free waffles. Look for one with adjustable temperature settings and a non-stick surface. Belgian-style makers create thicker waffles with deeper pockets for toppings, while classic American-style makers produce thinner, crispier results.
Essential Tools
- Large mixing bowls (at least 2)
- Whisk or electric mixer
- Measuring cups and spoons
- Silicone spatula for gentle mixing
- Ladle or measuring cup for portioning batter
- Wire cooling rack for keeping waffles crispy
- Baking sheet for the oven
Nice-to-Have Items
- Kitchen scale for precise measurements
- Batter dispenser for easy pouring
- Pastry brush for oiling the waffle maker
Storage & Meal Prep Tips
Refrigerator Storage
Store cooled gluten free waffles in an airtight container with parchment paper between layers to prevent sticking. They'll stay fresh in the refrigerator for up to 5 days. Reheat in a toaster or toaster oven for best results; the microwave makes them soggy.
Freezer Storage
These gluten free waffles are incredibly freezer-friendly, making them perfect for meal prep. Let waffles cool completely on a wire rack, then arrange them in a single layer on a baking sheet. Freeze for 2 hours until solid, then transfer to a freezer bag or container. They'll keep for up to 3 months. Toast directly from frozen; no thawing needed.
Make-Ahead Tips
You can mix the dry ingredients up to 1 week in advance and store in an airtight container. On busy mornings, just add the wet ingredients and cook. The batter itself should be cooked immediately after mixing for best texture.
Batch Cooking Strategy Make a double batch on the weekend and freeze extras for quick weekday breakfasts. You'll have homemade gluten free waffles ready faster than driving through a fast-food line.
The Golden Ratio Secret That Changes Everything
Here's what most recipes won't tell you: the ratio of liquid to flour in gluten free waffles is more critical than in regular waffles. Gluten-free flours absorb moisture differently, and getting this balance right is what separates mediocre waffles from extraordinary ones. The secret is using slightly less liquid than you think you need; the batter should coat the back of a spoon but still pour easily.
Another game-changing trick is the double leavening system in these gluten free waffles. Using both baking powder and baking soda creates maximum lift and that signature crispy exterior. The baking soda also reacts with the buttermilk's acidity to create extra tenderness. This combination is what professional bakers use to achieve bakery-quality results at home.
FAQ
Are Eggo waffles gluten-free?
Standard Eggo waffles are not gluten-free as they contain wheat flour. However, Eggo does make a gluten-free version specifically labeled as such. Always check the packaging carefully. Homemade gluten free waffles taste much better and contain no preservatives or artificial ingredients.
What are common mistakes making gluten-free waffles?
The biggest mistake is overmixing the batter, which creates dense, gummy gluten free waffles. Other common errors include not preheating the waffle maker properly, opening it too soon, using old baking powder that's lost its effectiveness, and not letting the batter rest before cooking.
What flours work best in gluten-free waffles?
A high-quality all-purpose gluten-free flour blend with xanthan gum works best for gluten free waffles. Good options include Bob's Red Mill 1-to-1 Baking Flour, King Arthur Gluten-Free Measure for Measure Flour, or Cup4Cup. For single-flour options, oat flour and almond flour create delicious results but need additional binding agents.
Does Costco carry gluten-free waffles?
Yes, Costco typically carries frozen gluten-free waffles from brands like Van's and Nature's Path. However, availability varies by location. Making your own gluten free waffles is more economical when you consider the cost per serving and superior taste.
Start Your Weekend Right with These Delicious Waffles
Now that you know all the secrets to making incredible gluten free waffles, it's time to fire up that waffle maker and create your own breakfast magic. These waffles prove that eating gluten-free doesn't mean sacrificing taste or texture. They're so good that everyone at your table will be asking for seconds, whether they need gluten-free options or not.
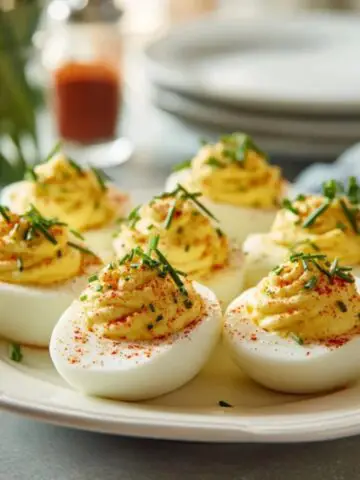
Once you've mastered these gluten free waffles, expand your breakfast repertoire with other delicious recipes. Try our Gluten Free Deviled Eggs Recipe for a protein-packed brunch addition, or make our Gluten Free French Toast Recipe for another weekend favorite. Both recipes are just as easy and delicious as these waffles. Remember, the best breakfast is one made with love in your own kitchen, and these gluten free waffles deliver that homemade goodness in every crispy, fluffy bite.
With love from my kitchen to yours,
Ashley Johnson
Related
Looking for other recipes like this? Try these:


Pairing
These are my favorite dishes to serve with this gluten free waffles recipe:


Gluten-Free Waffles Recipe
Equipment
- 1 Waffle maker Non-stick or Belgian-style preferred
- 2 Mixing bowls One large, one medium
- 1 Whisk For blending batter
- 1 Silicone spatula For gentle mixing
- 1 Measuring cup For pouring batter
- 1 Wire rack Keeps waffles crispy
- 1 Baking sheet For warming in oven
Ingredients
- 2 cups gluten-free all-purpose flour blend With xanthan gum included
- 2 tablespoon sugar Or coconut sugar for refined sugar-free option
- 2 teaspoon baking powder
- ½ teaspoon baking soda
- ½ teaspoon salt
- 1 teaspoon cinnamon Optional
- 2 large eggs Room temperature
- 1 ¾ cups buttermilk Or dairy-free milk with 1 tablespoon vinegar
- ⅓ cup melted coconut oil or butter
- 2 teaspoon vanilla extract
Instructions
- Preheat waffle maker and lightly grease with oil or spray.
- Whisk dry ingredients in a large bowl until evenly combined.
- Whisk eggs, buttermilk, melted oil, and vanilla in another bowl.
- Combine wet and dry mixtures; stir gently until just combined.
- Let batter rest for 5 minutes to thicken.
- Pour batter onto hot waffle maker; cook 3–5 minutes until golden and crisp.
- Keep cooked waffles on wire rack in a 200°F oven to stay crispy.


Leave a Reply