
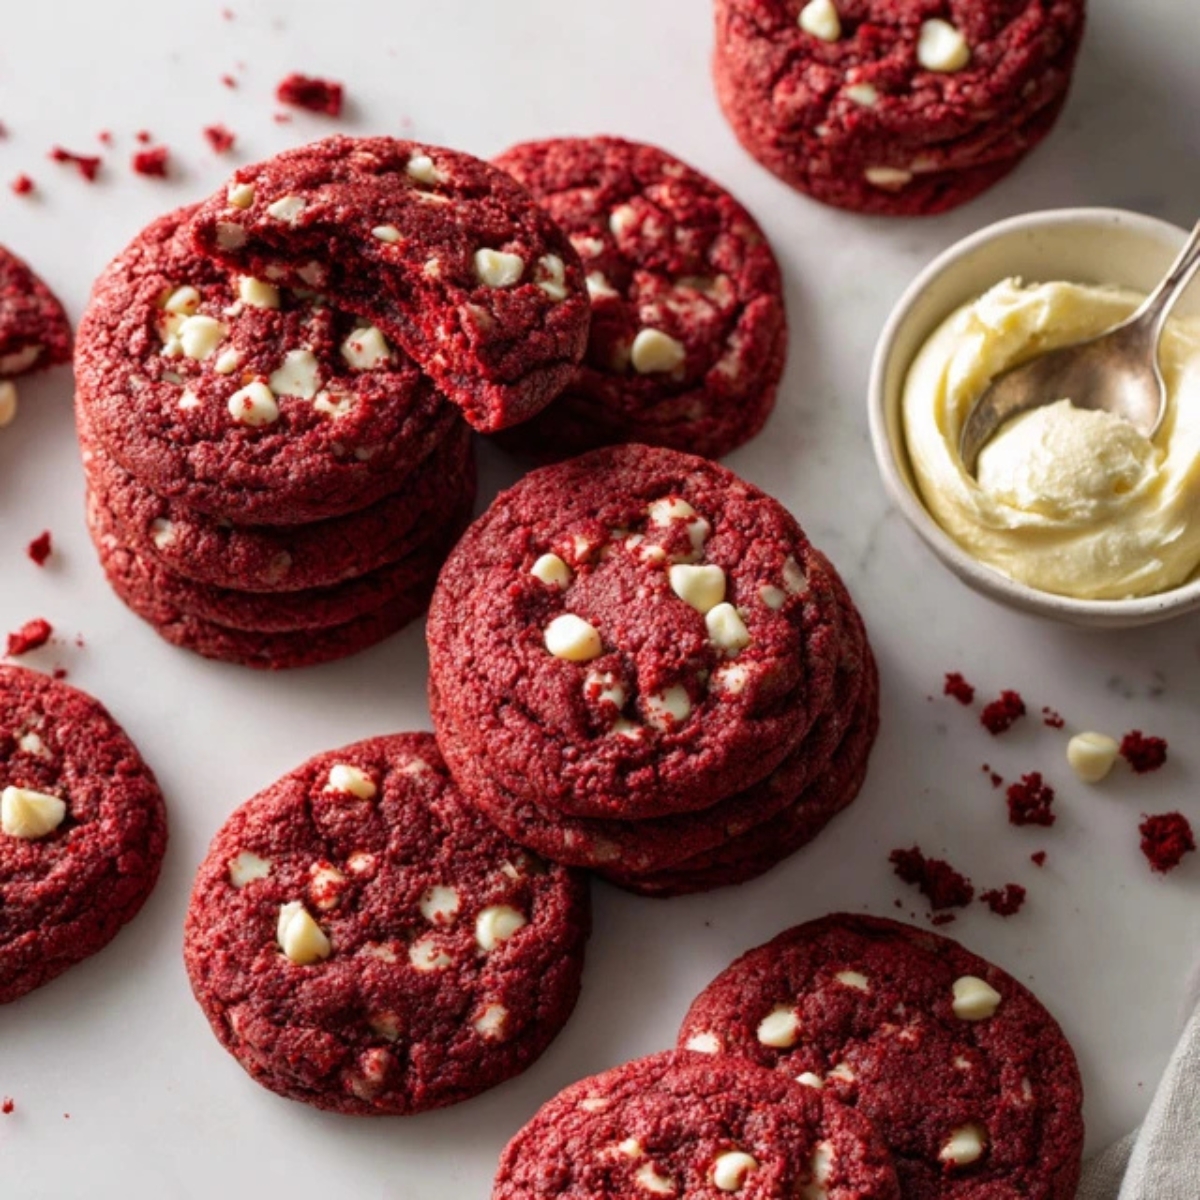
There's something magical about biting into a perfectly soft red velvet cookie that just melts in your mouth. I remember the first time I made these red velvet cookies for my family's Valentine's Day gathering; everyone went absolutely wild asking for seconds and thirds! The gorgeous ruby-red color combined with that signature cocoa flavor creates cookies that are not just treats but real showstoppers at any celebration. What makes this red velvet cookies recipe truly special is how it captures all the beloved flavors of classic red velvet cake but in a convenient, handheld form that's easier to make and even more fun to eat.
These homemade red velvet cookies strike the perfect balance between cake-like tenderness and that satisfying chewy texture we all crave in a good cookie. Whether you're baking for Christmas, Valentine's Day, or just because you deserve something amazing on a Tuesday afternoon, this red velvet cookies recipe will become your new go-to dessert that friends and family will beg you to make again and again.
Background & Why These Cookies Are Simply Irresistible
Red velvet desserts have been stealing hearts since the 1800s, but it wasn't until the Great Depression that the iconic red velvet cookies and cakes gained massive popularity across America. What started as a subtle reddish tint from natural cocoa reactions has evolved into the vibrant crimson treats we know today. These red velvet cookies combine the best of both worlds; the nostalgic flavors of traditional Southern baking with the convenience of modern cookie-making techniques that anyone can master in their own kitchen.
What truly sets this red velvet cookies recipe apart from others you'll find online is the careful balance of cocoa powder, buttermilk, and a secret ingredient that creates an incredibly moist texture that stays soft for days. Unlike cake mix shortcuts that can taste artificial, these cookies are made completely from scratch using real ingredients that deliver authentic flavor in every single bite. The addition of white chocolate chips provides delightful pockets of sweetness that complement the subtle chocolate notes, while the optional cream cheese frosting takes these red velvet cookies from delicious to absolutely divine.
Jump to:
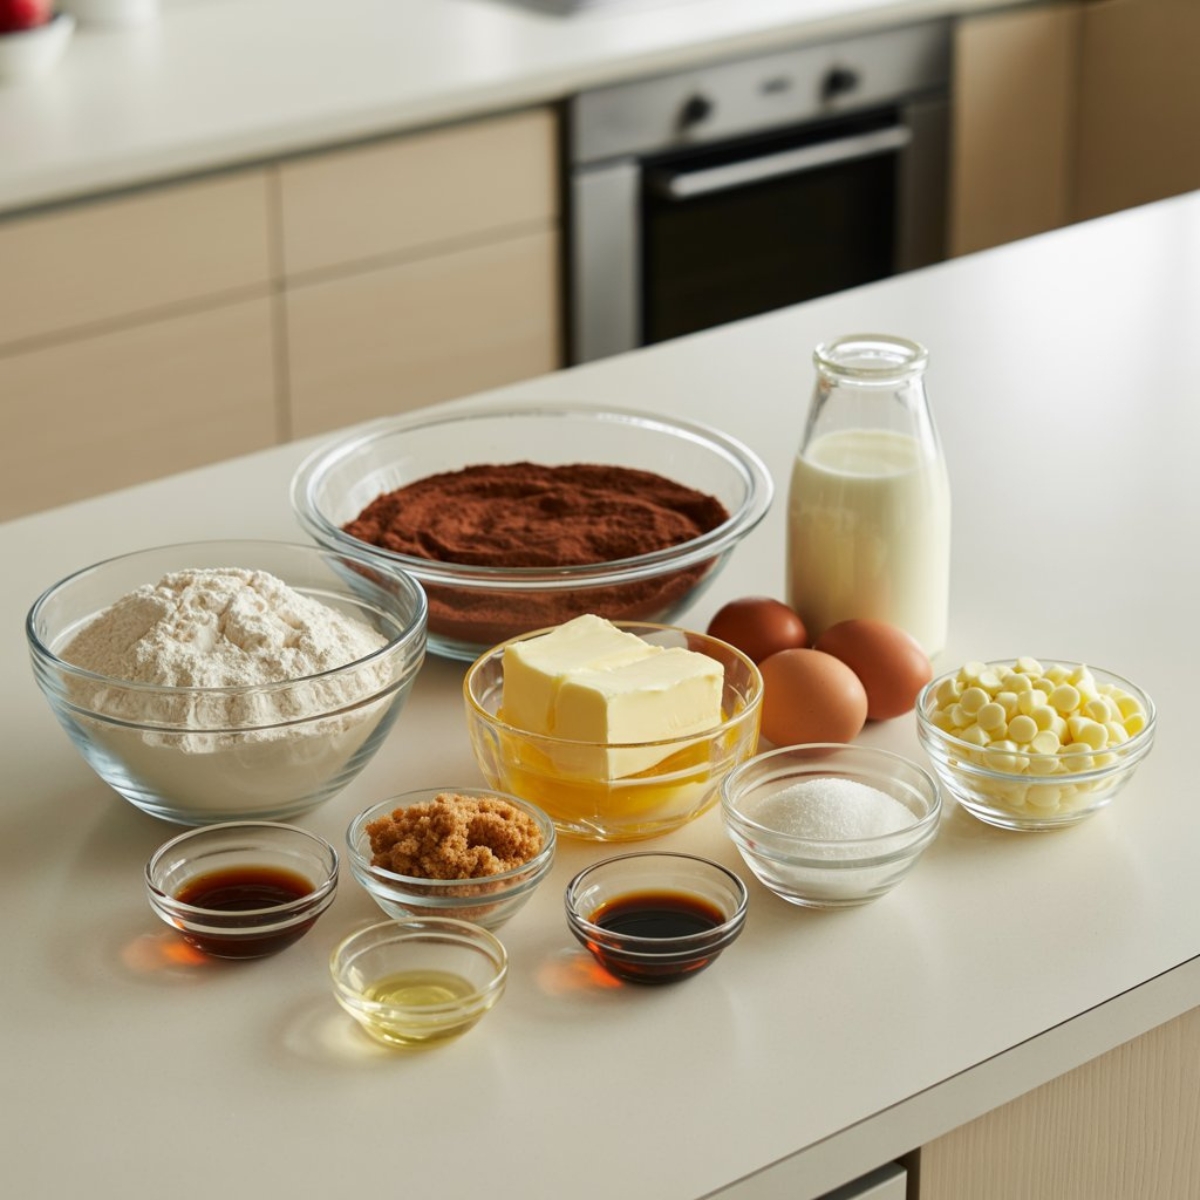
Ingredients
For the Red Velvet Cookies:
- All-purpose flour
- Unsweetened cocoa powder
- Baking soda
- Salt
- Unsalted butter, softened to room temperature
- Granulated sugar
- Light brown sugar, packed
- Eggs, room temperature
- Pure vanilla extract
- Liquid red food coloring (or natural beet powder alternative)
- White vinegar
- White chocolate chips
- Buttermilk, room temperature
For the Cream Cheese Frosting (Optional):
- Cream cheese, softened
- Unsalted butter, softened
- Powdered sugar
- Vanilla extract
See recipe card for quantities.
Instructions
Step 1: Preparing Your Cookie Dough Base
- Begin by preheating your oven to 350°F (175°C) and lining two large baking sheets with parchment paper or silicone baking mats for easy cleanup.
- In a medium mixing bowl, whisk together the all-purpose flour, cocoa powder, baking soda, and salt until everything is evenly distributed throughout the mixture.
- Using a stand mixer or electric hand mixer, cream the softened butter with both granulated and brown sugars on medium-high speed for about 3-4 minutes until the mixture becomes light, fluffy, and pale in color.
- Add the eggs one at a time to the butter mixture, beating well after each addition to ensure proper incorporation and a smooth texture.
- Mix in the vanilla extract, red food coloring, and white vinegar, beating until the dough takes on that signature vibrant red color that makes red velvet cookies so eye-catching.
Step 2: Combining Wet and Dry Ingredients
- With your mixer on low speed, gradually add half of the flour mixture to the wet ingredients, mixing just until you see a few streaks of flour remaining.
- Pour in the buttermilk and mix gently until just combined; this ingredient is crucial for creating that tender, moist texture.
- Add the remaining flour mixture and mix on low speed until no dry flour pockets remain, being careful not to overmix which can lead to tough cookies.
- Fold in the white chocolate chips using a rubber spatula, distributing them evenly throughout the cookie dough for consistent flavor in every bite.
Step 3: Shaping and Baking to Perfection
- Using a cookie scoop or tablespoon, portion out dough balls about 2 tablespoons in size, placing them approximately 2 inches apart on your prepared baking sheets.
- For that professional bakery appearance, gently press down each dough ball slightly with your palm to flatten them just a bit before baking.
- Bake in your preheated oven for 10-12 minutes; the cookies should look slightly underdone in the centers with set edges, as they'll continue cooking on the hot pan after removal.
- Let the cookies cool on the baking sheet for 5 minutes before transferring them to a wire cooling rack to cool completely.
Step 4: Creating the Cream Cheese Frosting
- While your cookies cool, beat the softened cream cheese and butter together using an electric mixer until the mixture is completely smooth and creamy with no lumps.
- Gradually add the powdered sugar one cup at a time, beating on low speed initially to prevent a sugar cloud in your kitchen, then increasing to medium-high speed.
- Mix in the vanilla extract and beat for an additional 2-3 minutes until the frosting is light, fluffy, and spreadable with a beautiful white color.
- Once cookies are completely cool, pipe or spread the cream cheese frosting on top, or create sandwich cookies by spreading frosting between two cookies for an extra indulgent treat.
Expert Cooking Tips
Temperature Matters for Texture
Always bring your eggs, buttermilk, and butter to room temperature before starting this red velvet cookies recipe. Cold ingredients don't incorporate properly and can result in dense, heavy cookies instead of the soft, tender texture we're aiming for. Simply set these ingredients out on your counter about 30-45 minutes before you plan to bake.
The Vinegar Secret
Don't skip the vinegar in this recipe; it reacts with the baking soda to create a subtle lift and contributes to that distinctive tangy flavor profile that makes red velvet desserts so unique. White vinegar works perfectly, but apple cider vinegar is an excellent alternative that adds a subtle depth of flavor.
Color Consistency Tips
- Use gel food coloring instead of liquid for more vibrant color with less liquid added to your dough
- Natural alternatives like beet powder create a more muted burgundy shade but keep the recipe completely natural
- Add food coloring gradually to achieve your desired shade; you can always add more but can't take it away
Preventing Overmixing
Once you add the flour mixture, mix just until combined and no white streaks remain. Overmixing develops too much gluten, resulting in tough, cake-like cookies instead of the tender, chewy red velvet cookies you want. When in doubt, slightly undermix and finish combining with a spatula.
Achieving Perfect Thickness
For thicker, chewier cookies, chill your dough for 30 minutes before scooping. For flatter, crispier edges with soft centers, bake the dough immediately after mixing. Both methods create delicious results with slightly different textures.
Recipe Variations & Substitutions
Dietary Adaptations
For gluten-free red velvet cookies, substitute the all-purpose flour with a 1:1 gluten-free baking flour blend that contains xanthan gum. The texture will be nearly identical to the original recipe. If you need dairy-free options, replace the butter with coconut oil or vegan butter, use dairy-free chocolate chips, and swap buttermilk with almond milk mixed with 1 tablespoon of lemon juice.
Flavor Variations to Try
- Double Chocolate Delight: Add ½ cup of dark chocolate chips alongside the white chocolate for a richer chocolate experience
- Peppermint Red Velvet: Mix in ½ teaspoon of peppermint extract and crushed candy canes for a festive Christmas cookie variation
- Cream Cheese Stuffed: Roll a small ball of cream cheese frosting, freeze it, then wrap cookie dough around it before baking for a surprise center
- Red Velvet Crinkle Style: Roll dough balls in powdered sugar before baking to create that beautiful crackled appearance
Creative Mix-In Ideas
Beyond white chocolate chips, try chopped pecans or walnuts for added crunch, mini marshmallows for a rocky road twist, or even crushed Oreo cookies for an over-the-top dessert cookie. Dark chocolate chunks create a more sophisticated flavor profile that adults especially love.
Natural Coloring Alternatives
If you prefer to avoid artificial food coloring, use 2-3 tablespoons of beet powder or freeze-dried strawberry powder. These natural options create beautiful pink-to-red hues while adding subtle earthy or fruity notes that complement the cocoa flavor perfectly.
Equipment Recommendations
- Stand Mixer or Hand Mixer: Essential for properly creaming butter and sugar to create the perfect light, fluffy texture these red velvet cookies deserve
- Cookie Scoop: A 2-tablespoon cookie scoop ensures uniform size for even baking and professional presentation
- Silicone Baking Mats: Reusable, non-stick surface that browns cookies evenly and eliminates the need for parchment paper
- Wire Cooling Rack: Allows air to circulate around cooling cookies, preventing soggy bottoms and maintaining that perfect texture
- Piping Bag with Star Tip: Creates beautiful, bakery-style frosting swirls on your finished cookies for Instagram-worthy presentation
Storage & Meal Prep Tips
Room Temperature Storage
Store unfrosted red velvet cookies in an airtight container at room temperature for up to 5 days. Place parchment paper between layers to prevent sticking. Add a slice of bread to the container; it releases moisture that keeps cookies soft and prevents them from drying out.
Refrigeration Guidelines
If you've frosted your cookies with cream cheese frosting, they must be stored in the refrigerator in an airtight container for up to 4 days. Let them sit at room temperature for 10-15 minutes before serving for the best flavor and texture. The frosting will firm up when cold but softens beautifully as it warms.
Freezing Instructions for Later
- Cookie Dough: Scoop dough into balls, freeze on a baking sheet until solid, then transfer to freezer bags for up to 3 months; bake directly from frozen, adding 2 extra minutes
- Baked Cookies: Freeze unfrosted cookies in airtight containers or freezer bags with parchment between layers for up to 3 months; thaw at room temperature for 20 minutes
- Frosting: Cream cheese frosting freezes well separately for up to 2 months; thaw overnight in refrigerator and rewhip before using
Make-Ahead Strategy
Prepare the cookie dough up to 2 days in advance and store it covered in the refrigerator. This actually improves the flavor as ingredients meld together. When ready to bake, let dough sit at room temperature for 10 minutes for easier scooping.
The Game-Changing Buttermilk Secret
Here's something most red velvet cookies recipes won't tell you; the buttermilk is the real MVP ingredient that transforms ordinary cookies into something extraordinary. When buttermilk's acidity interacts with the baking soda, it creates a chemical reaction that produces tender, incredibly moist red velvet cookies with that signature tangy undertone that keeps people coming back for more.
My grandmother always insisted on using full-fat buttermilk rather than low-fat versions, and after years of testing, I finally understand why she was absolutely right. The fat content in whole buttermilk contributes to a richer flavor and softer texture that you simply cannot replicate with substitutes, making these red velvet cookies taste like they came straight from an upscale bakery rather than your home kitchen.
FAQ
What is red velvet cookie made of?
Red velvet cookies are made from a combination of all-purpose flour, cocoa powder, butter, sugar, eggs, buttermilk, vanilla extract, red food coloring, and white vinegar. The buttermilk and vinegar create that signature tangy flavor, while the cocoa powder provides subtle chocolate notes that make red velvet cookies distinct from regular sugar cookies.
What flavor is red velvet exactly?
Red velvet cookies have a subtle cocoa chocolate flavor combined with a slight tanginess from buttermilk and vinegar, creating a unique taste that's less intensely chocolate than brownies but richer than vanilla cookies. The flavor profile is often described as a perfect balance between chocolate and vanilla with a hint of tanginess.
Have red velvet Oreos been discontinued?
Red velvet Oreos have been periodically available as a limited edition seasonal flavor, typically appearing around Valentine's Day. While they're not permanently discontinued, they aren't always in stores year-round, which makes homemade red velvet cookies a reliable alternative when you're craving that flavor.
Why add vinegar to red velvet cookies?
Vinegar is essential in red velvet cookies because it reacts with the baking soda to create lift and tenderness while also enhancing the red color from the cocoa powder's natural pigments. This chemical reaction also contributes to that characteristic slight tanginess that distinguishes red velvet cookies from regular chocolate cookies.
Share the Red Velvet Love
These incredible red velvet cookies prove that you don't need to be a professional baker to create stunning, delicious desserts that wow everyone at your table. The combination of that gorgeous vibrant color, tender chewy texture, and optional cream cheese frosting makes these cookies absolutely perfect for Valentine's Day, Christmas celebrations, birthday parties, or whenever you need something special to brighten an ordinary day.
Once you master this red velvet cookies recipe, you'll find yourself making them again and again for every occasion that calls for something sweet and memorable. If you loved these cookies, you'll definitely want to try our Red Velvet Lava Cake Recipe for an even more indulgent chocolate experience, or wake up to something special with our Red Velvet Pancakes Recipe that brings these same beloved flavors to your breakfast table. Don't forget to share your baking success with friends and family; these red velvet cookies are meant to be enjoyed together with the people you love most!
With love from my kitchen to yours,
Taylor Monroe
Related
Looking for other recipes like this? Try these:


Pairing
These are my favorite dishes to serve with this red velvet cookies recipe:


Red Velvet Cookies Recipe
Equipment
- Stand mixer or hand mixer For creaming butter and sugar
- Mixing bowls Separate for dry and wet ingredients
- Silicone baking mat or parchment paper For even baking
- Cookie scoop Ensures uniform cookie size
- Wire cooling rack For proper air circulation
- Piping bag with star tip For optional frosting decoration
Ingredients
For the Red Velvet Cookies
- 2 ¼ cups all-purpose flour spooned and leveled
- 2 tablespoons unsweetened cocoa powder for classic red velvet flavor
- 1 teaspoon baking soda helps cookies rise
- ½ teaspoon salt enhances flavor
- ½ cup unsalted butter softened to room temperature
- 1 cup granulated sugar
- ½ cup light brown sugar packed
- 2 large eggs room temperature
- 2 teaspoons pure vanilla extract
- 1 tablespoon red food coloring or beet powder alternative
- 1 teaspoon white vinegar activates baking soda
- ½ cup buttermilk room temperature
- 1 cup white chocolate chips optional but recommended
For the Cream Cheese Frosting (Optional)
- 4 ounces cream cheese softened
- 2 tablespoons unsalted butter softened
- 1 ½ cups powdered sugar
- 1 teaspoon vanilla extract
Instructions
- Preheat oven to 350°F (175°C) and line baking sheets.
- Whisk flour, cocoa, baking soda, and salt together.
- Cream butter and sugars until fluffy.
- Add eggs, vanilla, red coloring, and vinegar.
- Alternate adding dry mix and buttermilk; fold in chocolate chips.
- Scoop 2 tablespoon dough balls, flatten slightly, and bake 10–12 minutes.
- Cool 5 minutes, then transfer to rack.
- Beat frosting ingredients until smooth and spread on cooled cookies.


Leave a Reply